Custom Pages
Build the content side of your site — content pages, external links, and grouping menus that show up in your top navigation.
The Content editor lives under APPEARANCE → Content in the admin sidebar. It manages three kinds of items, all listed together in the Pages, Links & Menus table:
- Pages — full content pages with a URL on your site (e.g.
/about). - Links — external URLs that appear in your navigation but point off-site.
- Menus — dropdown groupings (like "Resources") that hold other pages and links.
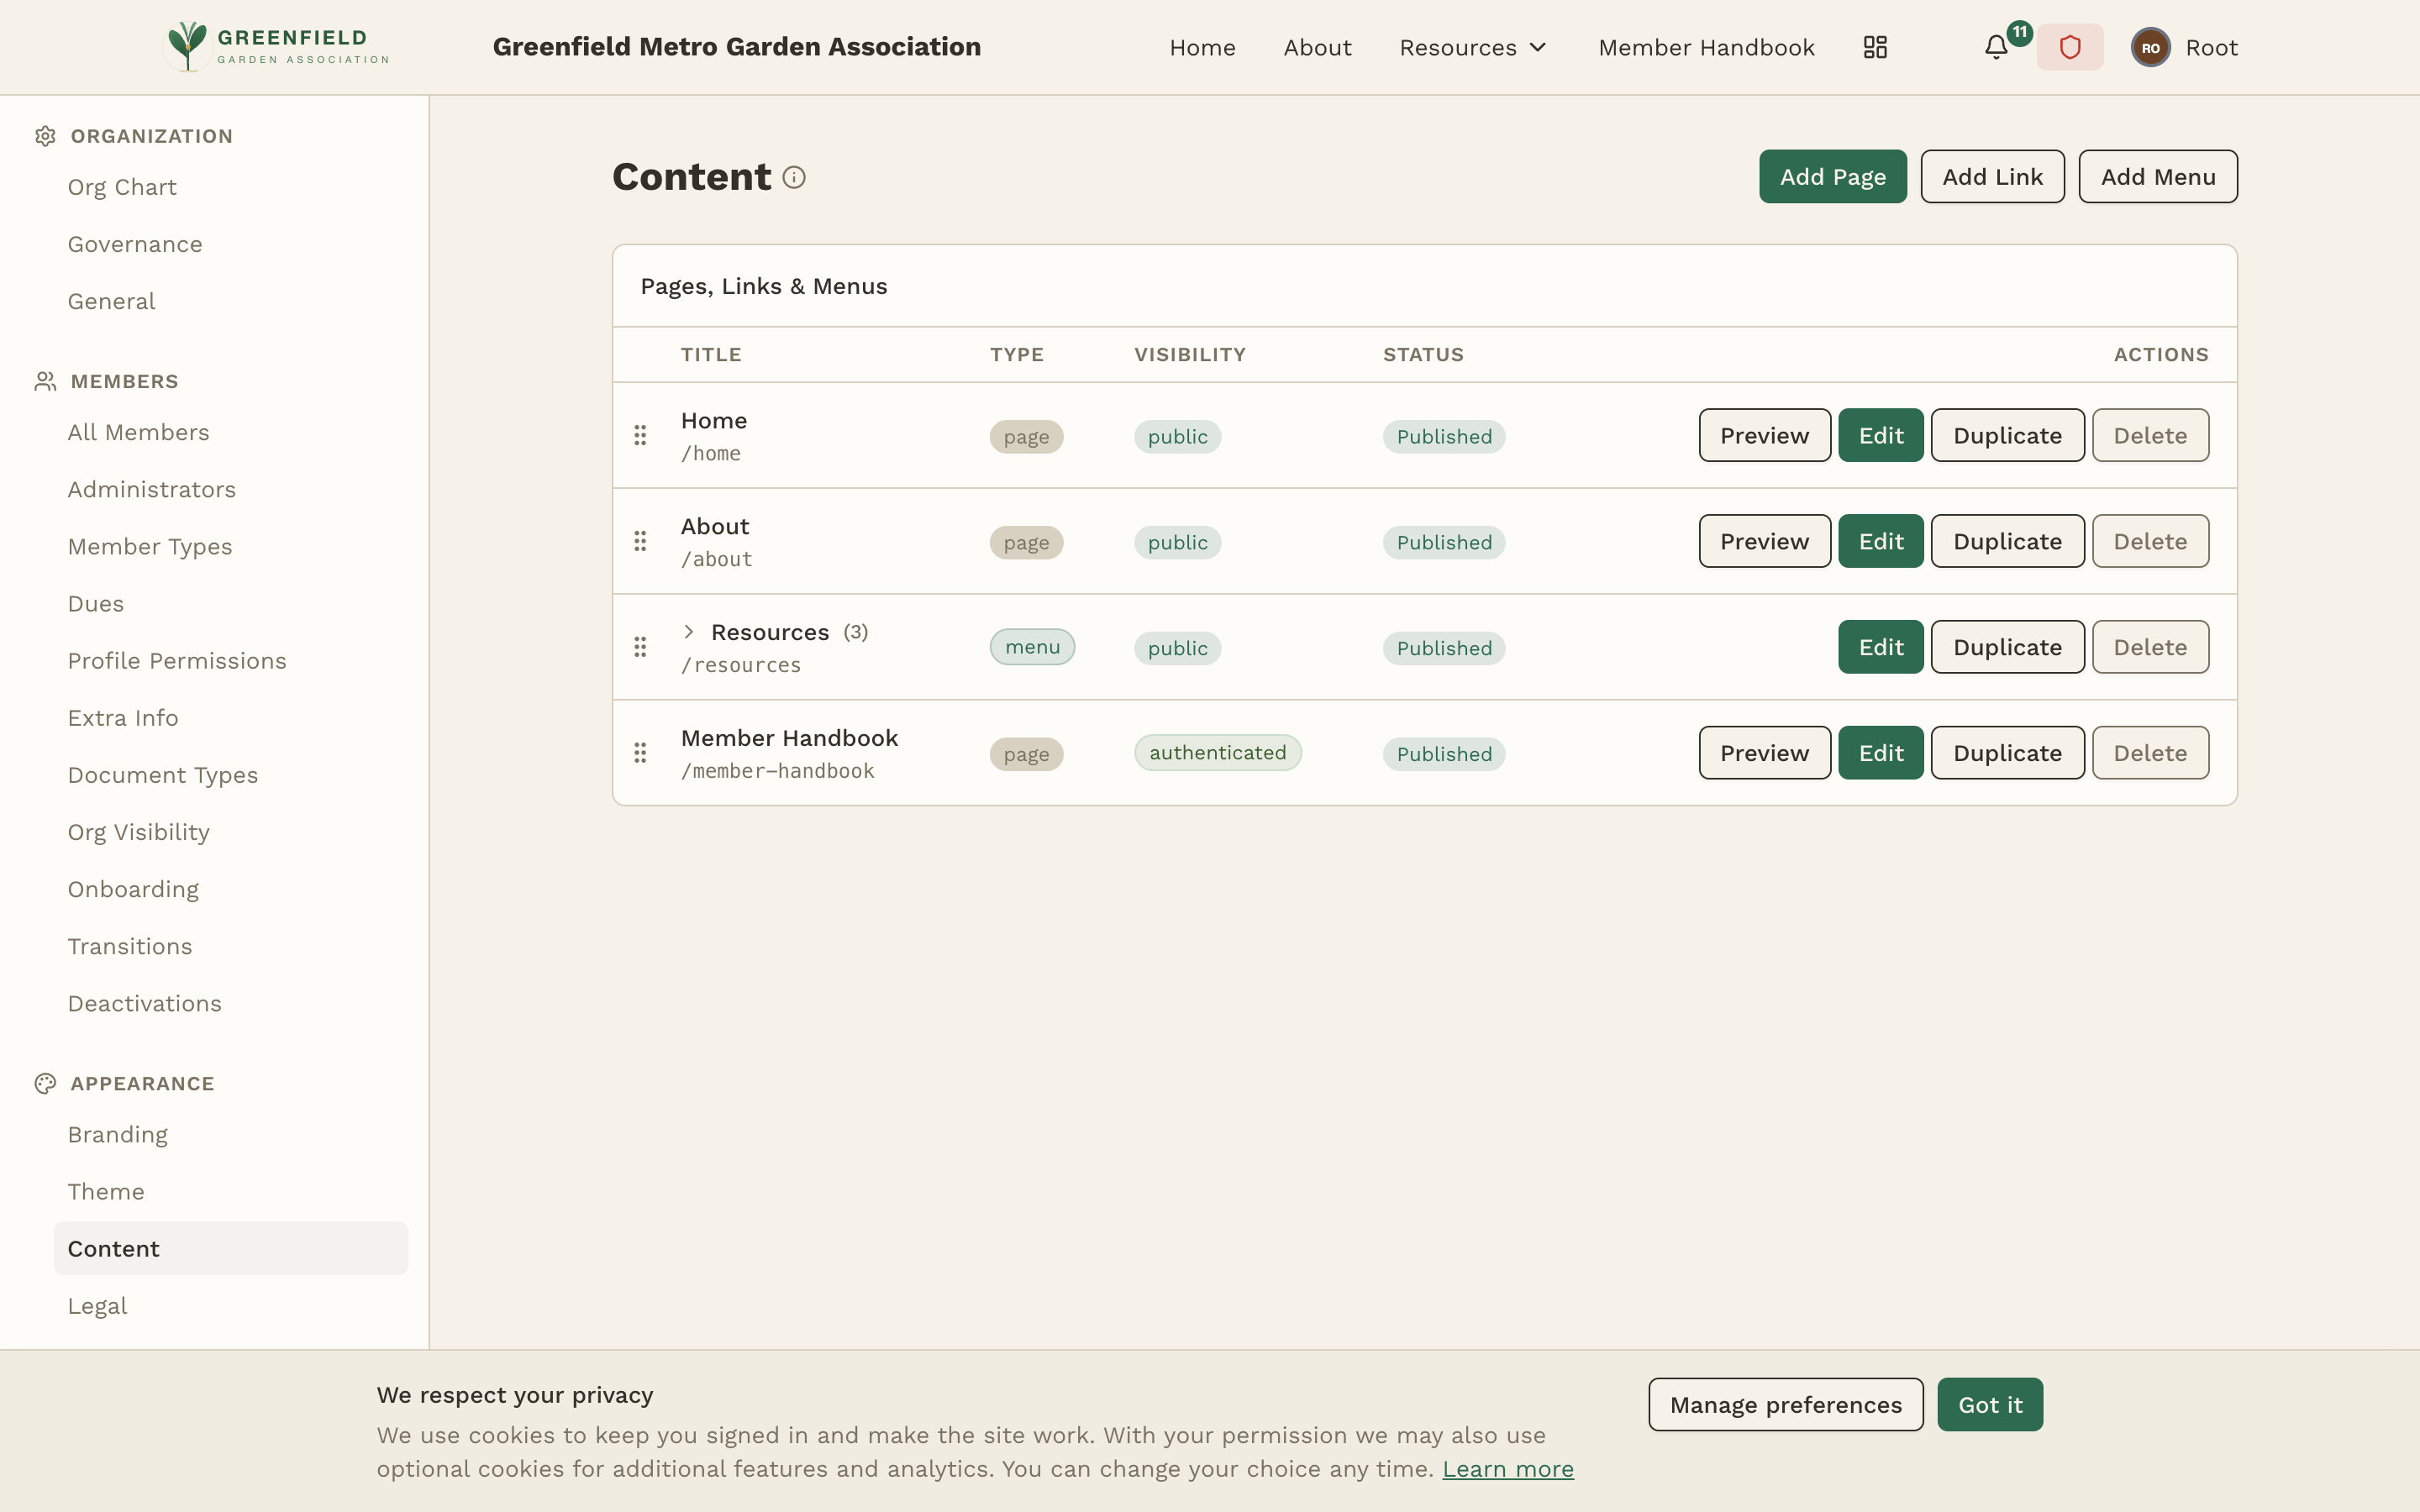
The table at the top of the page shows every existing item with columns for Title, Type (page / link / menu), Visibility, Status, and per-row Preview, Edit, Duplicate, and Delete actions.
Creating a Page
- Navigate to APPEARANCE → Content in the admin sidebar.
- Click the Add Page button at the top of the page.
- Enter a title for the page (e.g., "About Us", "Club History", "Bylaws").
- Set the URL slug — this determines the page's web address. For example, a slug of
aboutcreates the page at/abouton your site. - Choose the visibility:
- Public — visible to anyone, including non-logged-in visitors.
- Authenticated — only visible to logged-in members.
- Write your content using the rich text editor.
- Save to publish the page.
Adding an External Link
Use a Link when you want a navigation item that opens an off-site URL — your association's external website, a partner organization, a Google Drive folder, etc.
- Click the Add Link button at the top of the Content page.
- Give the link a title (this is what members see in the nav).
- Enter the destination URL.
- Choose visibility — Public or Authenticated.
- Save.
Adding a Menu (Grouping)
Menus are dropdown groupings shown in the top navigation. The default Resources menu is a good example — it groups multiple pages under a single nav item. Create your own menus when you have several related items that would otherwise crowd the nav bar.
- Click the Add Menu button at the top of the Content page.
- Give the menu a title — this is the nav label members see (e.g. "Resources", "About Our Club").
- Choose visibility.
- Save the menu, then add pages and links into it. The number in parentheses next to the menu name in the table (e.g. "Resources (3)") shows how many items live inside it.
Common Uses for Custom Pages
About Page
Tell your organization's story — when it was founded, its mission, and what makes it special. Great for public visibility.
Club History
A detailed history of your organization, including founding members, milestones, and notable achievements over the years.
Bylaws
Your organization's governing document. Mark this as members-only so it's accessible to members but not the general public.
FAQs
Answer common questions about membership, events, dues, and how to get involved. Helpful for prospective members.
Contact / Join Us
A public page with information on how to contact your organization or apply for membership.
Resources
Links to external resources, partner organizations, or documents that members frequently need to reference.
The Rich Text Editor
The content editor supports rich formatting for creating professional-looking pages:
- Text formatting — bold, italic, underline, strikethrough
- Headings — H1 through H3 for page structure
- Lists — bulleted and numbered lists
- Links — hyperlinks to external sites or internal pages
- Images — upload and embed images within your content
You can also paste content from other sources (Word documents, Google Docs, etc.) and the editor will preserve basic formatting. Complex formatting may be simplified during the paste.
Where Pages Appear
Pages and links can either appear directly in the top navigation as their own item (like the default Home and About entries) or live inside a menu (like the items inside the default Resources dropdown). The order of items in the navigation matches the order in the Pages, Links & Menus table — reorder by drag-and-drop.
Keep the number of custom pages manageable. If you have more than 6-8 pages, the Resources menu can become cluttered. Consider consolidating related content into fewer, more comprehensive pages instead of many small ones.
Editing and Deleting Pages
To edit an existing page, click the Edit button next to it in the pages list. The editor opens below with the page's current content loaded. Make your changes and click Save.
To delete a page, click the Delete button. You'll be asked to confirm the deletion. Once confirmed, the page is permanently removed — both from the site and from the navigation menu.
Deleting a page is permanent and cannot be undone. If the page had a public URL that was shared externally (bookmarked, linked from other sites), those links will return a 404 error after deletion. Consider switching the page to Authenticated visibility instead of deleting it if you're unsure.
Public vs. Authenticated
Each item has a visibility setting that controls who can see it:
- Public items are visible to everyone — including people who haven't signed up or logged in. Use this for content meant to attract new members or inform the general public about your organization.
- Authenticated items require login to view. If a non-logged-in visitor tries to access an authenticated page, they'll be redirected to the login page. Use this for internal documents like bylaws, meeting minutes, or member resources.
You can change visibility on any existing item at any time by editing it and toggling the visibility setting.