Your Settings
The account pages behind your name in the top bar — profile, family, password, security, signature and notifications.
Your account pages live behind your own name in the top bar — not in the left sidebar. Click it and a menu opens with eight entries:
- Profile — Your own member profile. The Edit button on it opens your details for changing. Covered below.
- My Family — "Your secondary members (e.g. a partner) and any requests you've submitted," with an Add Family Member button.
- Password — Change your password. Covered below.
- Security — "Review where you're signed in and which sign-in methods are connected to your account." Lists your active sessions, each with its own Sign out, and your passkeys.
- Group Signature — The block appended to your group posts. Covered below.
- Notifications — Email and push delivery. See Notifications.
- Help & Support — "Open a ticket and we'll get back to you," with a New ticket button and a list of the tickets you've opened.
- Logout.
Each of these is its own page, labeled ACCOUNT above its title. There is no separate settings area with its own side nav — the left sidebar stays where it is while you are on them.
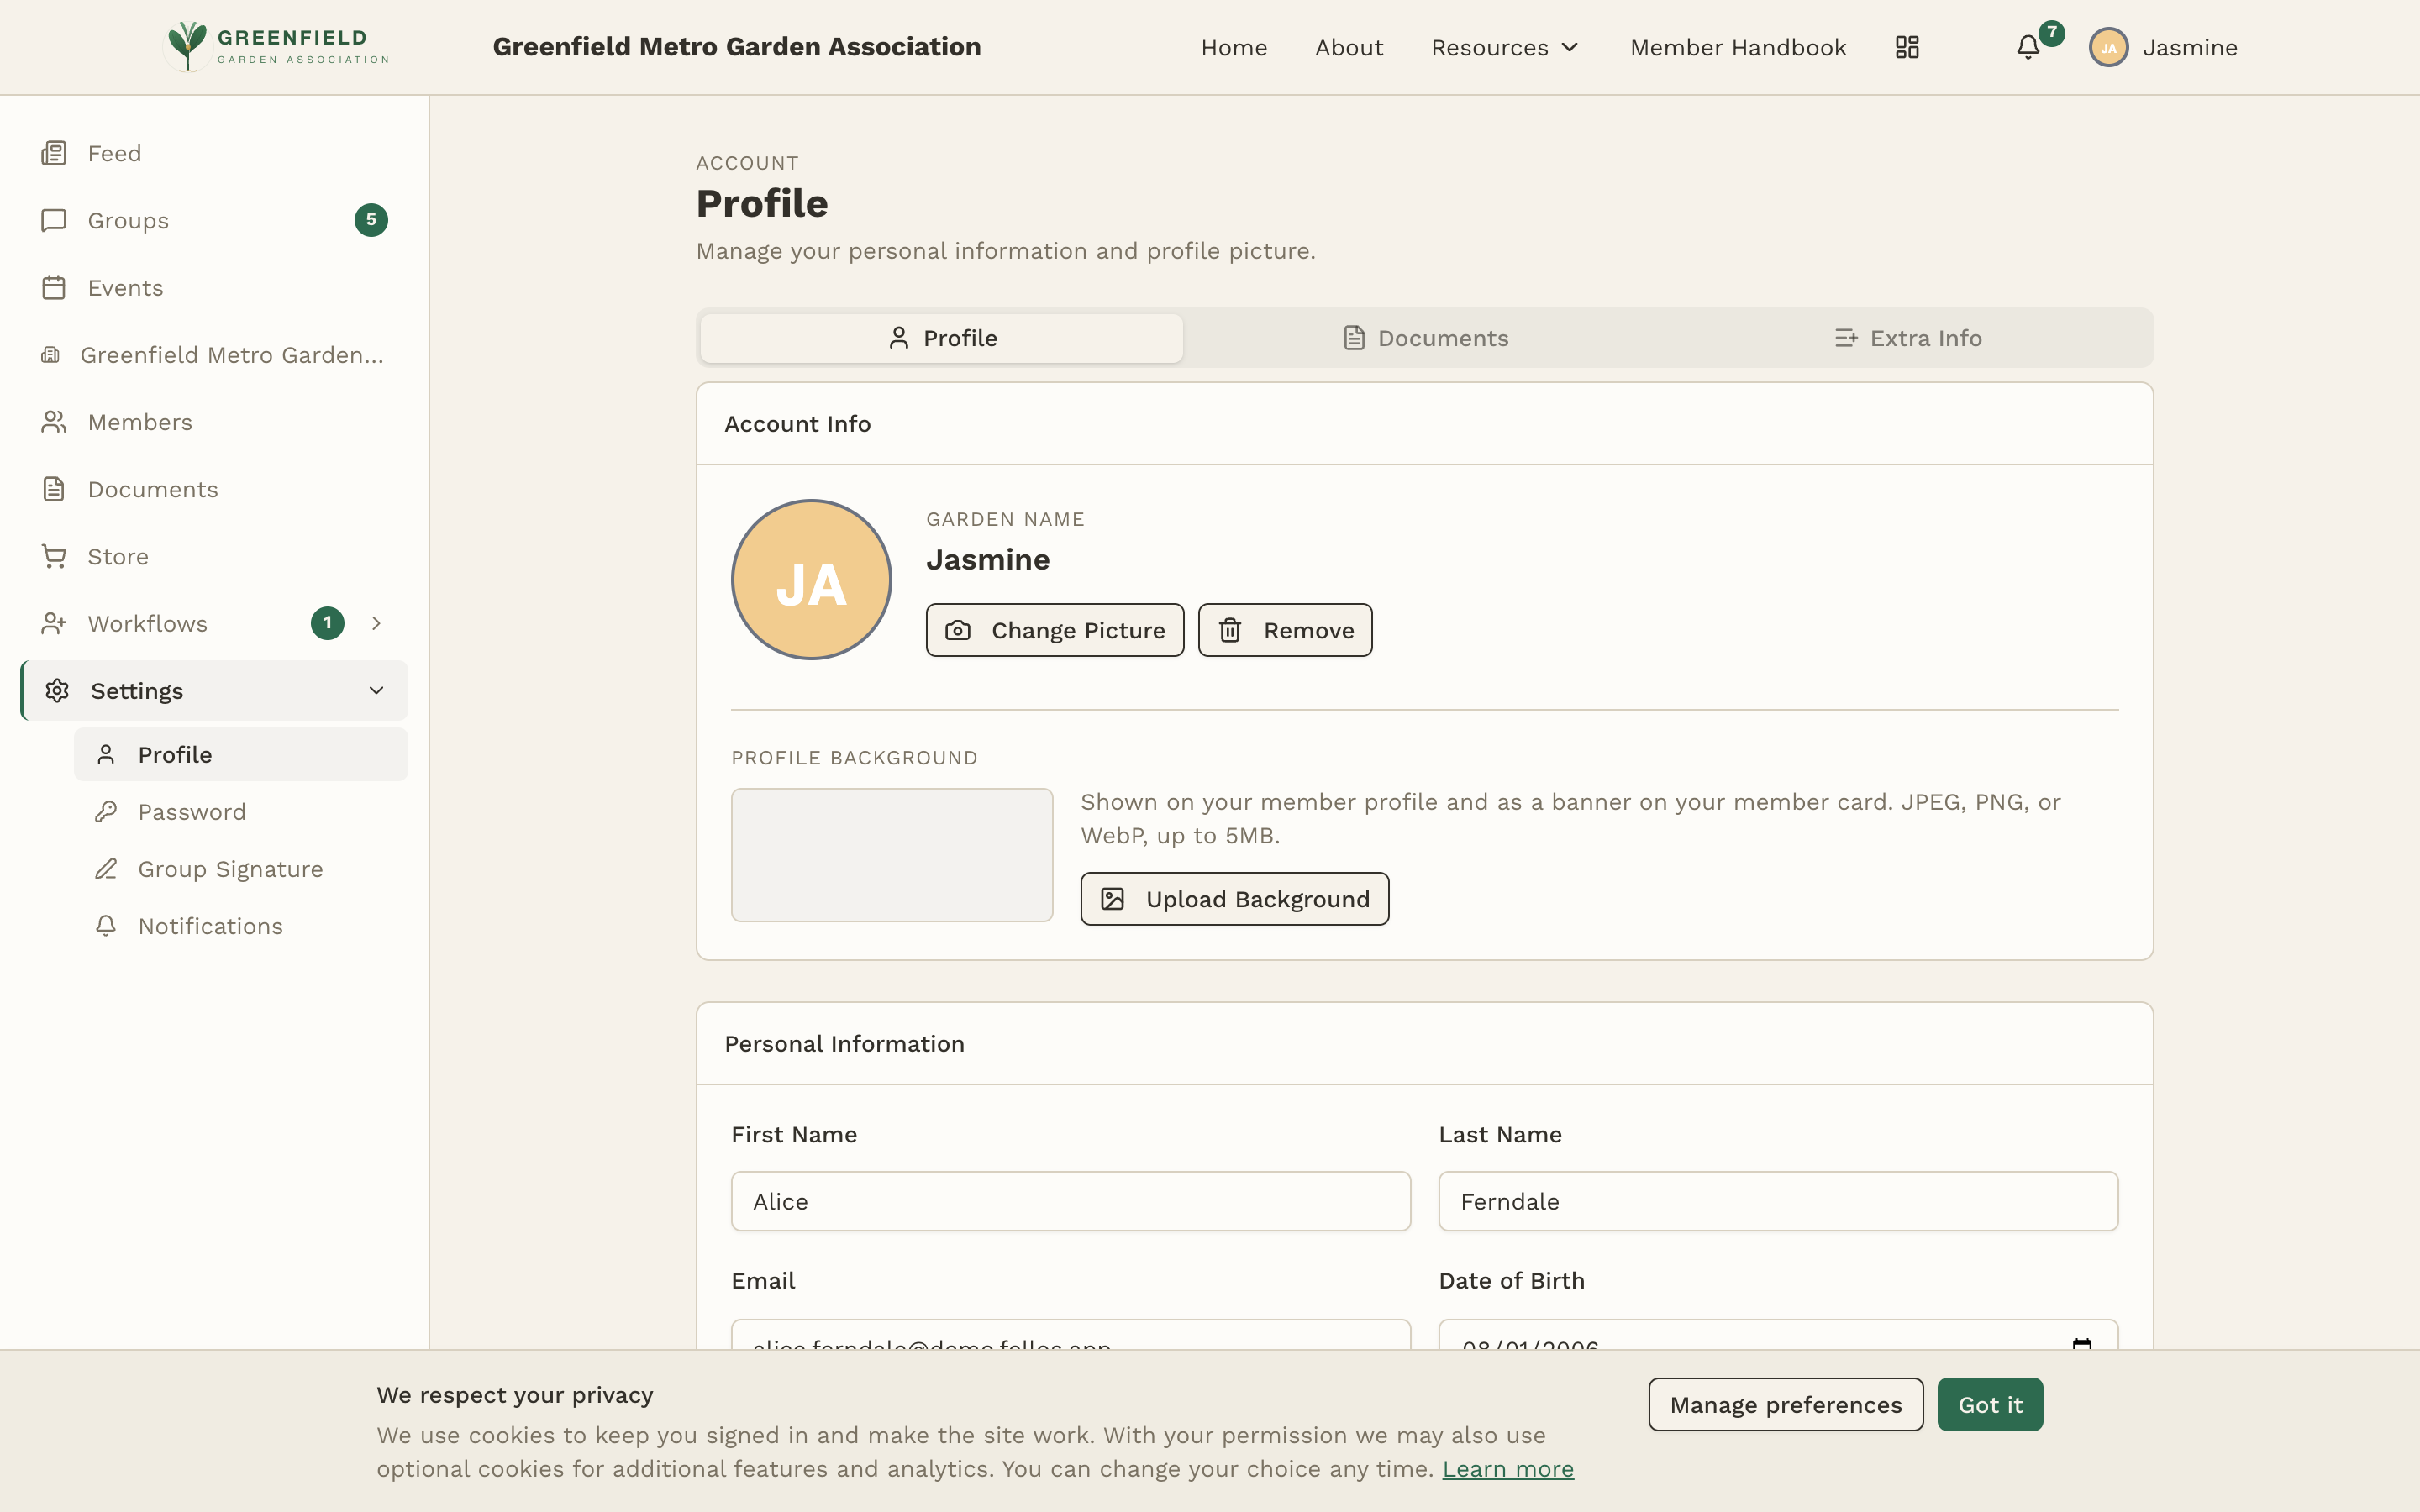
Profile
Click your name in the top bar, then Profile, then the Edit button. The top of the page shows your Account Info — your nickname — whatever your organization calls its display-name field (a "road name" in a motorcycle club, a "garden name" in a garden association) — plus your avatar and a profile background you can upload. Three tabs run across it: Profile, Documents and Extra Info. The Profile tab holds your own details, in two blocks:
Personal Information
First Name, Last Name, Email, and Date of Birth.
Contact Information
Phone Number, Address Line 1, Address Line 2, City, State / Province, Postal Code, Country.
Profile Links
Facebook, Instagram, TikTok, LinkedIn, a website, and Venmo, Cash App and PayPal handles. Its own block on the Profile tab, with its own Save links button.
Extra Info
Custom fields your admin has set up — things like equipment, certifications, or shirt size. Whether you can edit each one depends on your admin's configuration.
The other two tabs are Documents — any attachments your organization requires from you, with the status of each — and Extra Info, the custom fields your admin has set up.
Watch the save buttons: Personal and Contact save together with Save Changes, Profile Links has its own Save links, and Extra Info has its own Save Extra Info. Filling in two blocks and pressing one button saves one of them.
Some fields may be locked by your admin — you can see the value but can't change it. Things like member type and organization assignment are almost always admin-managed. If a field you expected to edit is read-only, that's why.
Uploading Your Profile Picture
Your profile picture appears next to your name throughout fellos — in the feed, in group posts, on the member directory, and on your profile page. The avatar controls are in the Account Info section at the top of the Profile page, alongside a Profile Background — "Shown on your member profile and as a banner on your member card. JPEG, PNG, or WebP, up to 5MB."
- Click your name in the top bar, then Profile, then Edit.
- Click Change Picture under your current avatar (or the initials circle, if you haven't uploaded one yet).
- Select an image file from your device.
- Click Remove if you ever want to take your photo down and go back to initials.
Pick a clear, well-lit photo where your face is visible. In larger organizations where not everyone knows each other personally, a recognizable avatar really helps.
Changing Your Password
Click your name in the top bar, then Password. You'll need your current password to set a new one.
- Enter your Current Password.
- Enter your New Password (minimum 8 characters).
- Enter it again in Confirm New Password.
- Click Change Password.
Use a strong, unique password that you don't use for other websites. If you ever forget your password, use the "Forgot Password" link on the login page to reset it via email.
Group Signature
A group signature is a block of text that fellos appends to the bottom of each post you make in a discussion group, separated from the body by a divider line. It's how many members identify themselves with their chapter, title, or a personal tagline.
To set or change yours:
- Click your name in the top bar, then Group Signature.
- Use the rich-text editor to enter your signature — you can bold text, add links, bullets, headings, and more. There's a 2,000-character limit.
- Click Save Signature.
Common things people put in a signature:
- Their full name or display name
- An officer title (e.g., "President, Cedar Chapter")
- A short motto or tagline
- Their chapter name
Signatures are optional. Leave it blank and nothing is appended. Keep it short — a line or two is ideal. Very long signatures clutter threads.
General Tips
- Each section saves separately. Personal + Contact share a Save Changes button; Profile Links has Save links; Extra Info has Save Extra Info; Password and Group Signature each have their own.
- Admins can see your profile fields. Even fields that are hidden from regular members by privacy settings are visible to your organization's administrators.
- Notifications are covered separately. See the Notifications page for how to turn on email and push delivery.
- Passwords are not the only way in. The Security page lets you add a passkey — "Sign in faster with Face ID, Touch ID, Windows Hello, or a hardware key. Your password still works."