Events
View, RSVP to, and create events to keep your organization's calendar organized.
The Events section in fellos helps your organization stay coordinated. Whether it's a monthly meeting, an annual fundraiser, or a casual get-together, events keep everyone on the same page about what's happening, when, and where.
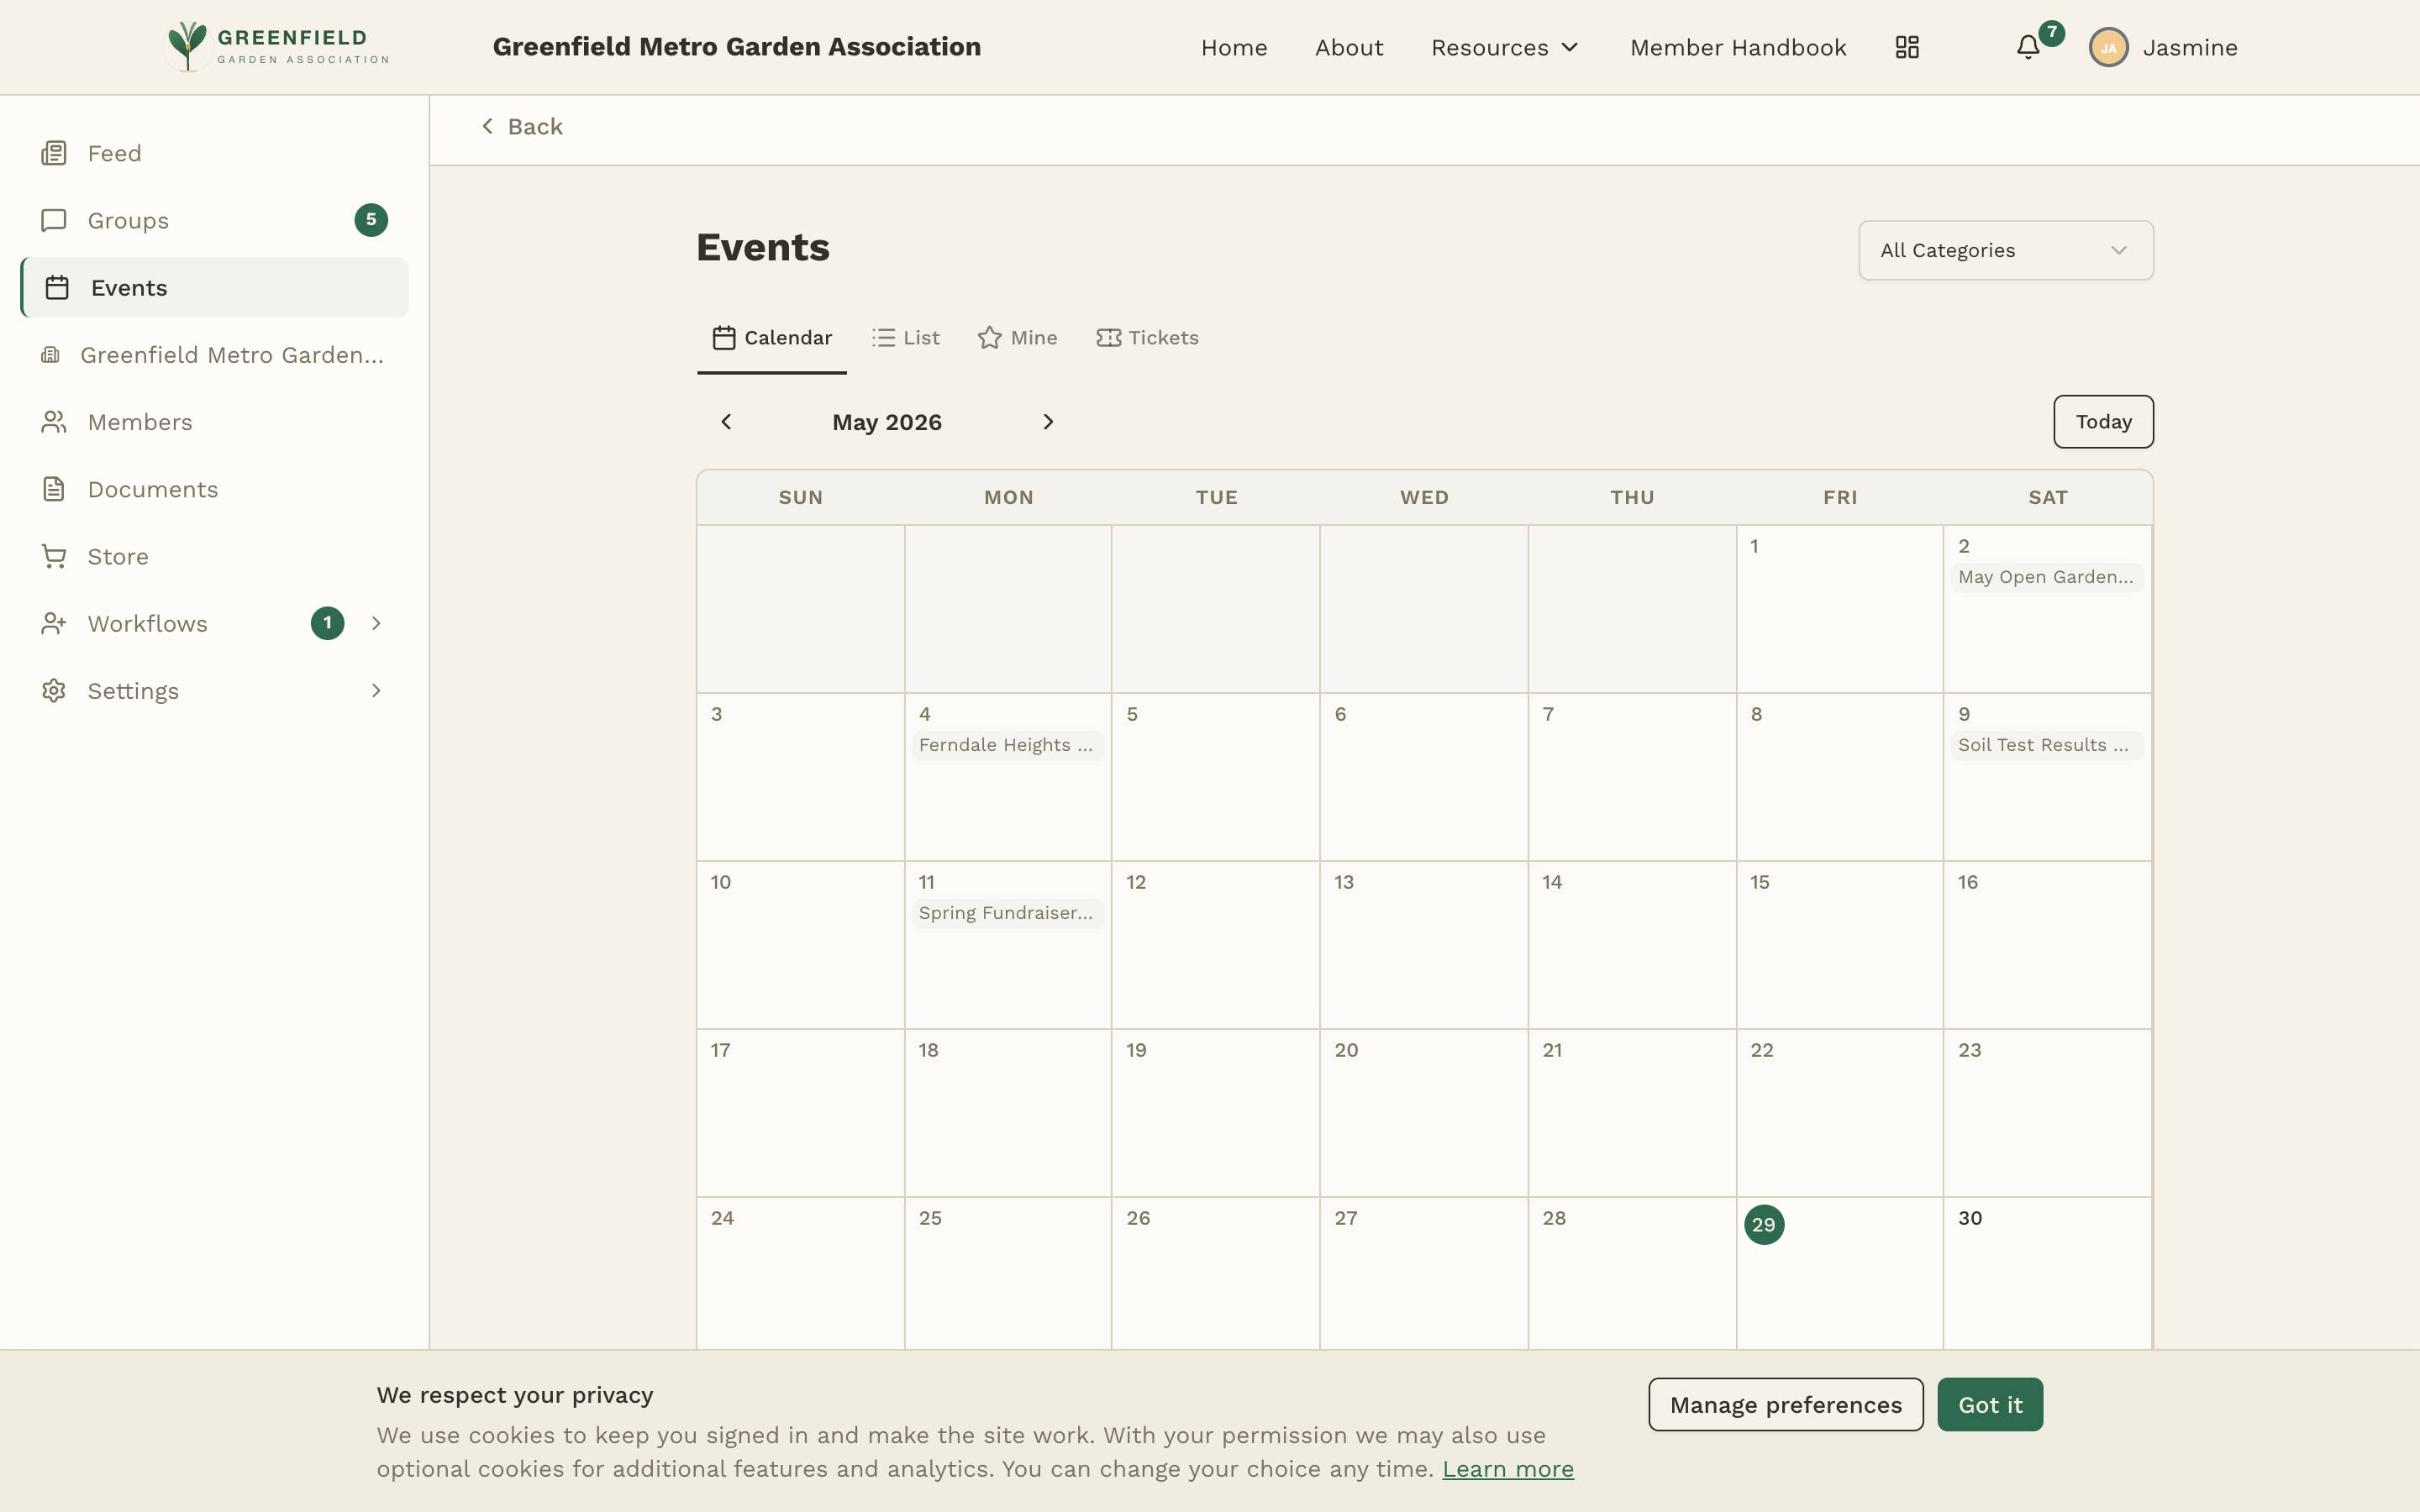
The top of the page has four view tabs — Calendar, List, Mine, and Tickets — plus an All Categories filter that lets you narrow the view to one category at a time.
Calendar View
The default view is a monthly calendar. Each day with one or more events shows the event titles directly on the date cell. Events are color-coded by category.
To navigate:
- Use the left and right arrows to move between months.
- Click Today to jump back to the current month.
- Click any event to open its full detail page.
List View
The List tab shows a chronological list of events. Each row shows date, title, time, location, and the attendee count. It's faster to scan than the calendar when you want to see what's on the horizon.
Mine
The Mine tab filters to events you've RSVP'd to (or created, if your member type allows event creation). It's a quick way to see your personal schedule without scanning the whole org's calendar.
Tickets
The Tickets tab lists the ticketed events you've purchased a seat for. Each row has a Ticket button that opens your QR-coded ticket. See Paid Events & Tickets below for the full purchase and check-in flow.
Viewing an Event
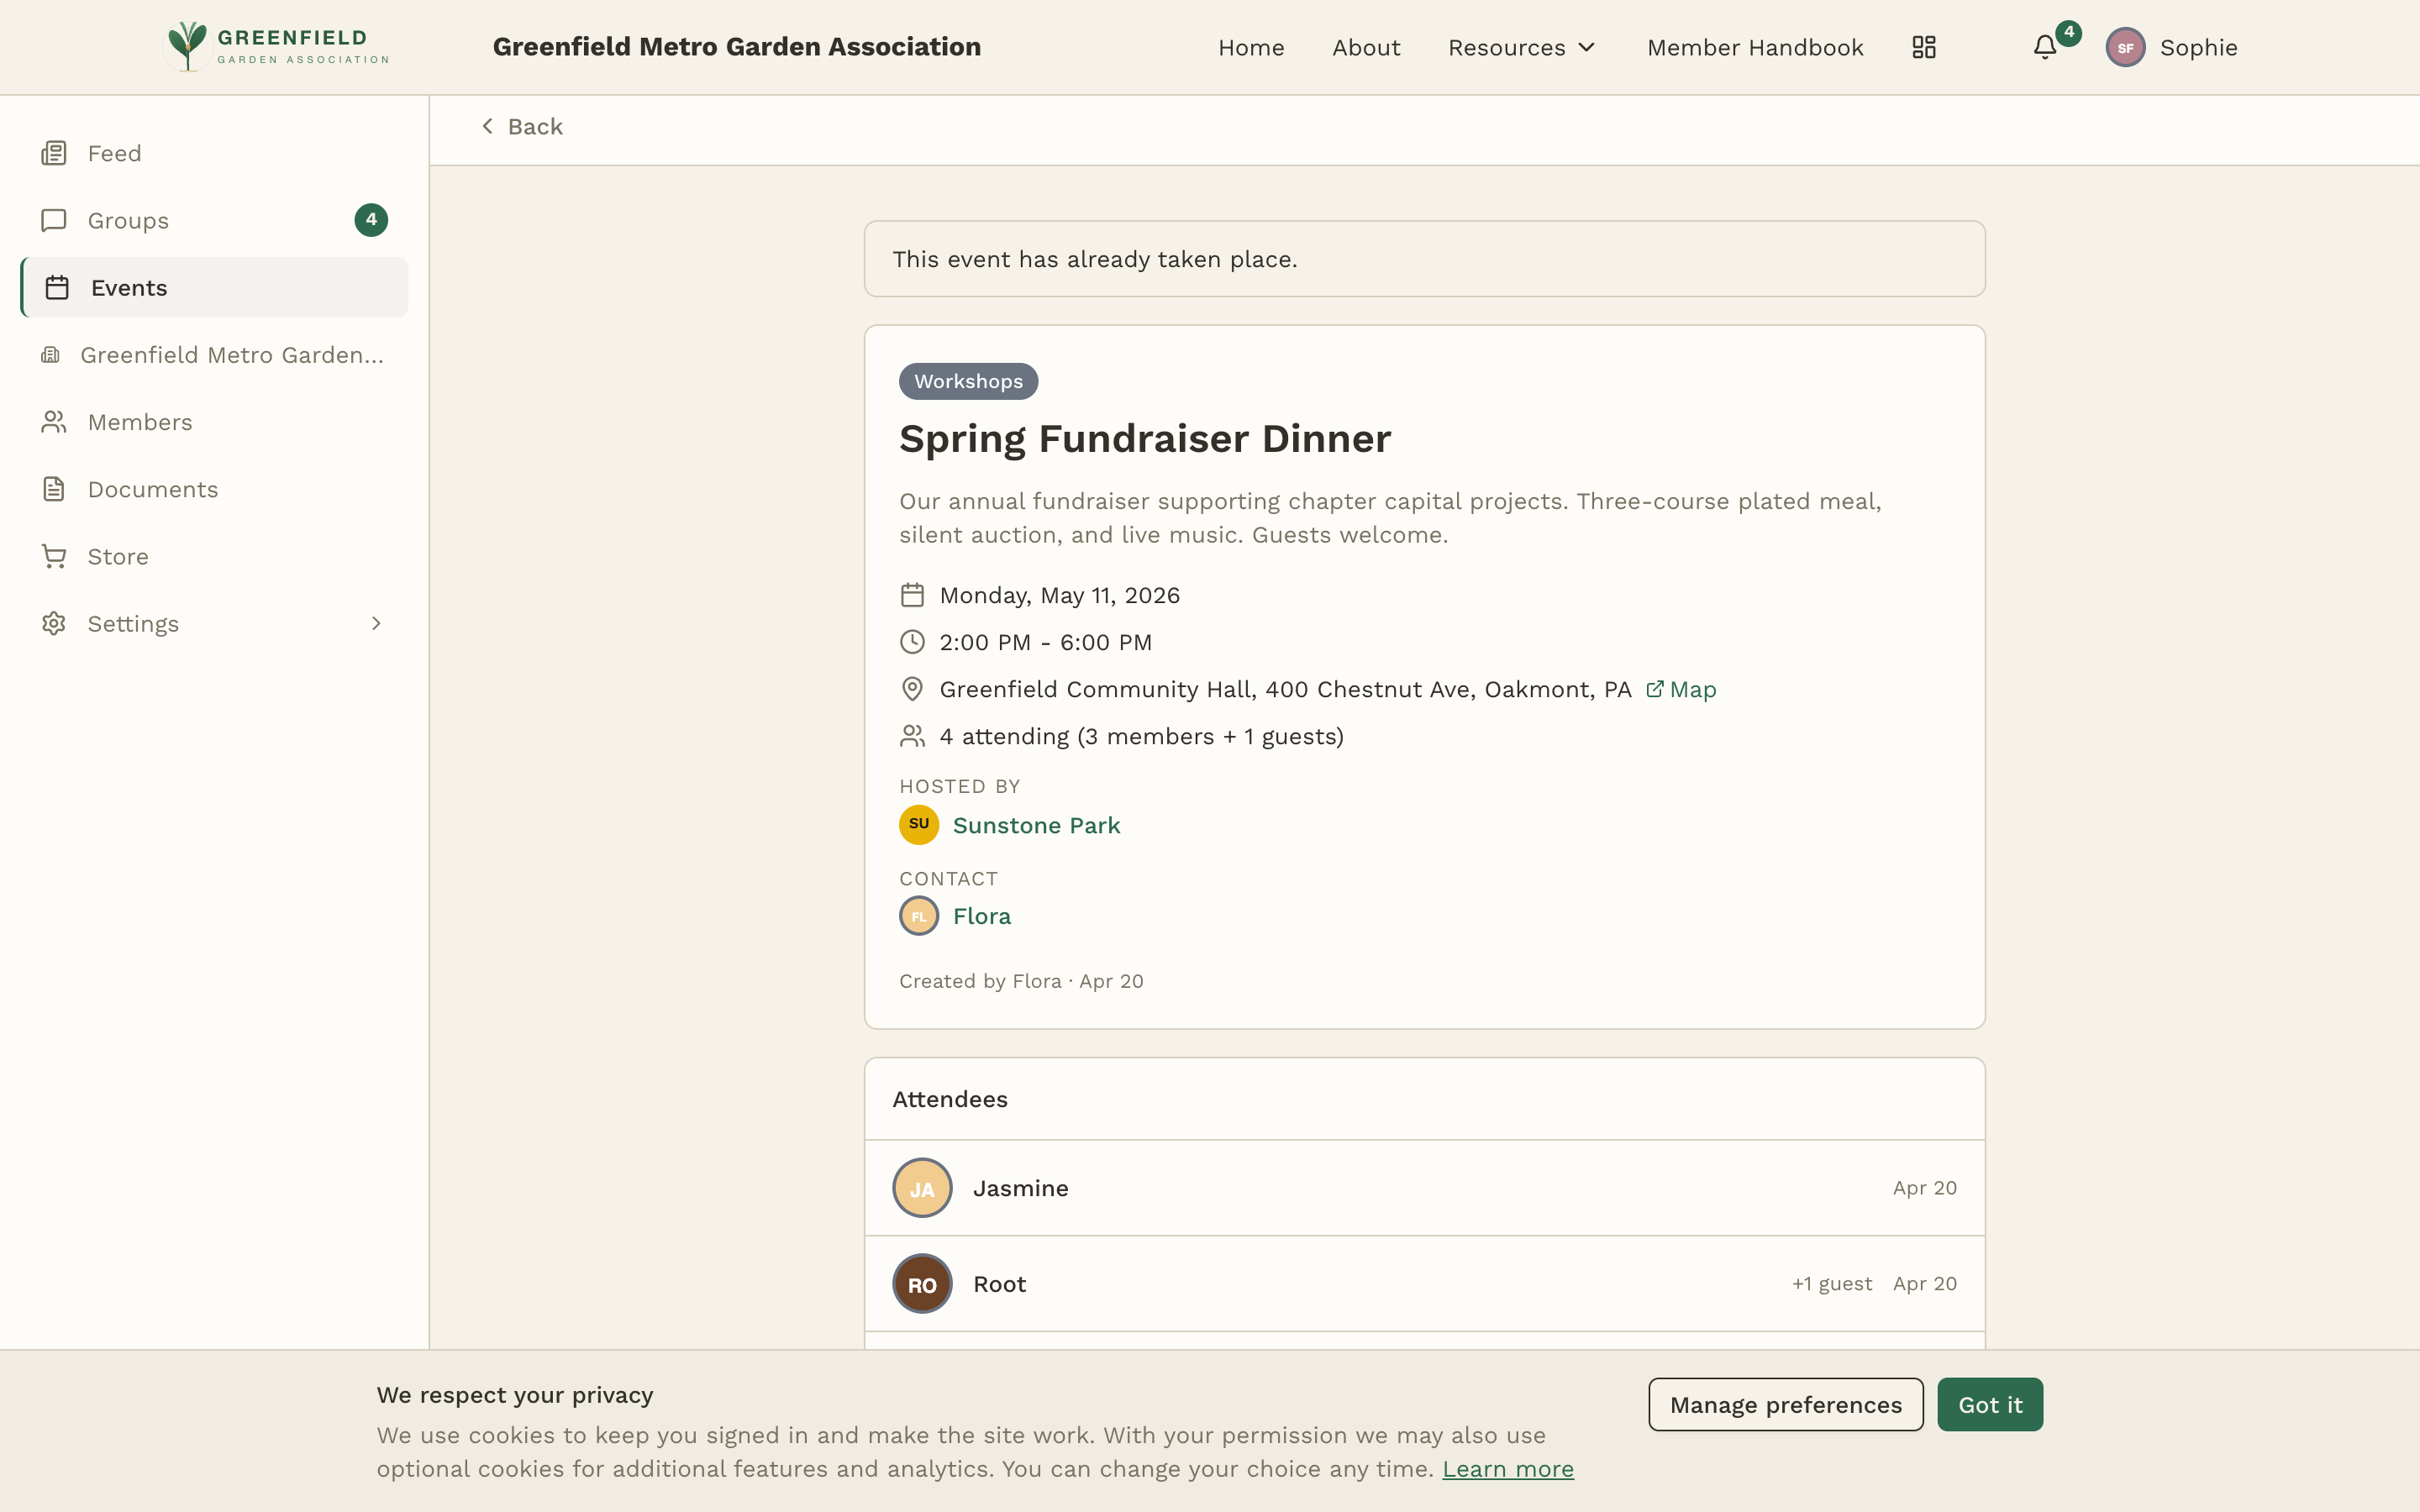
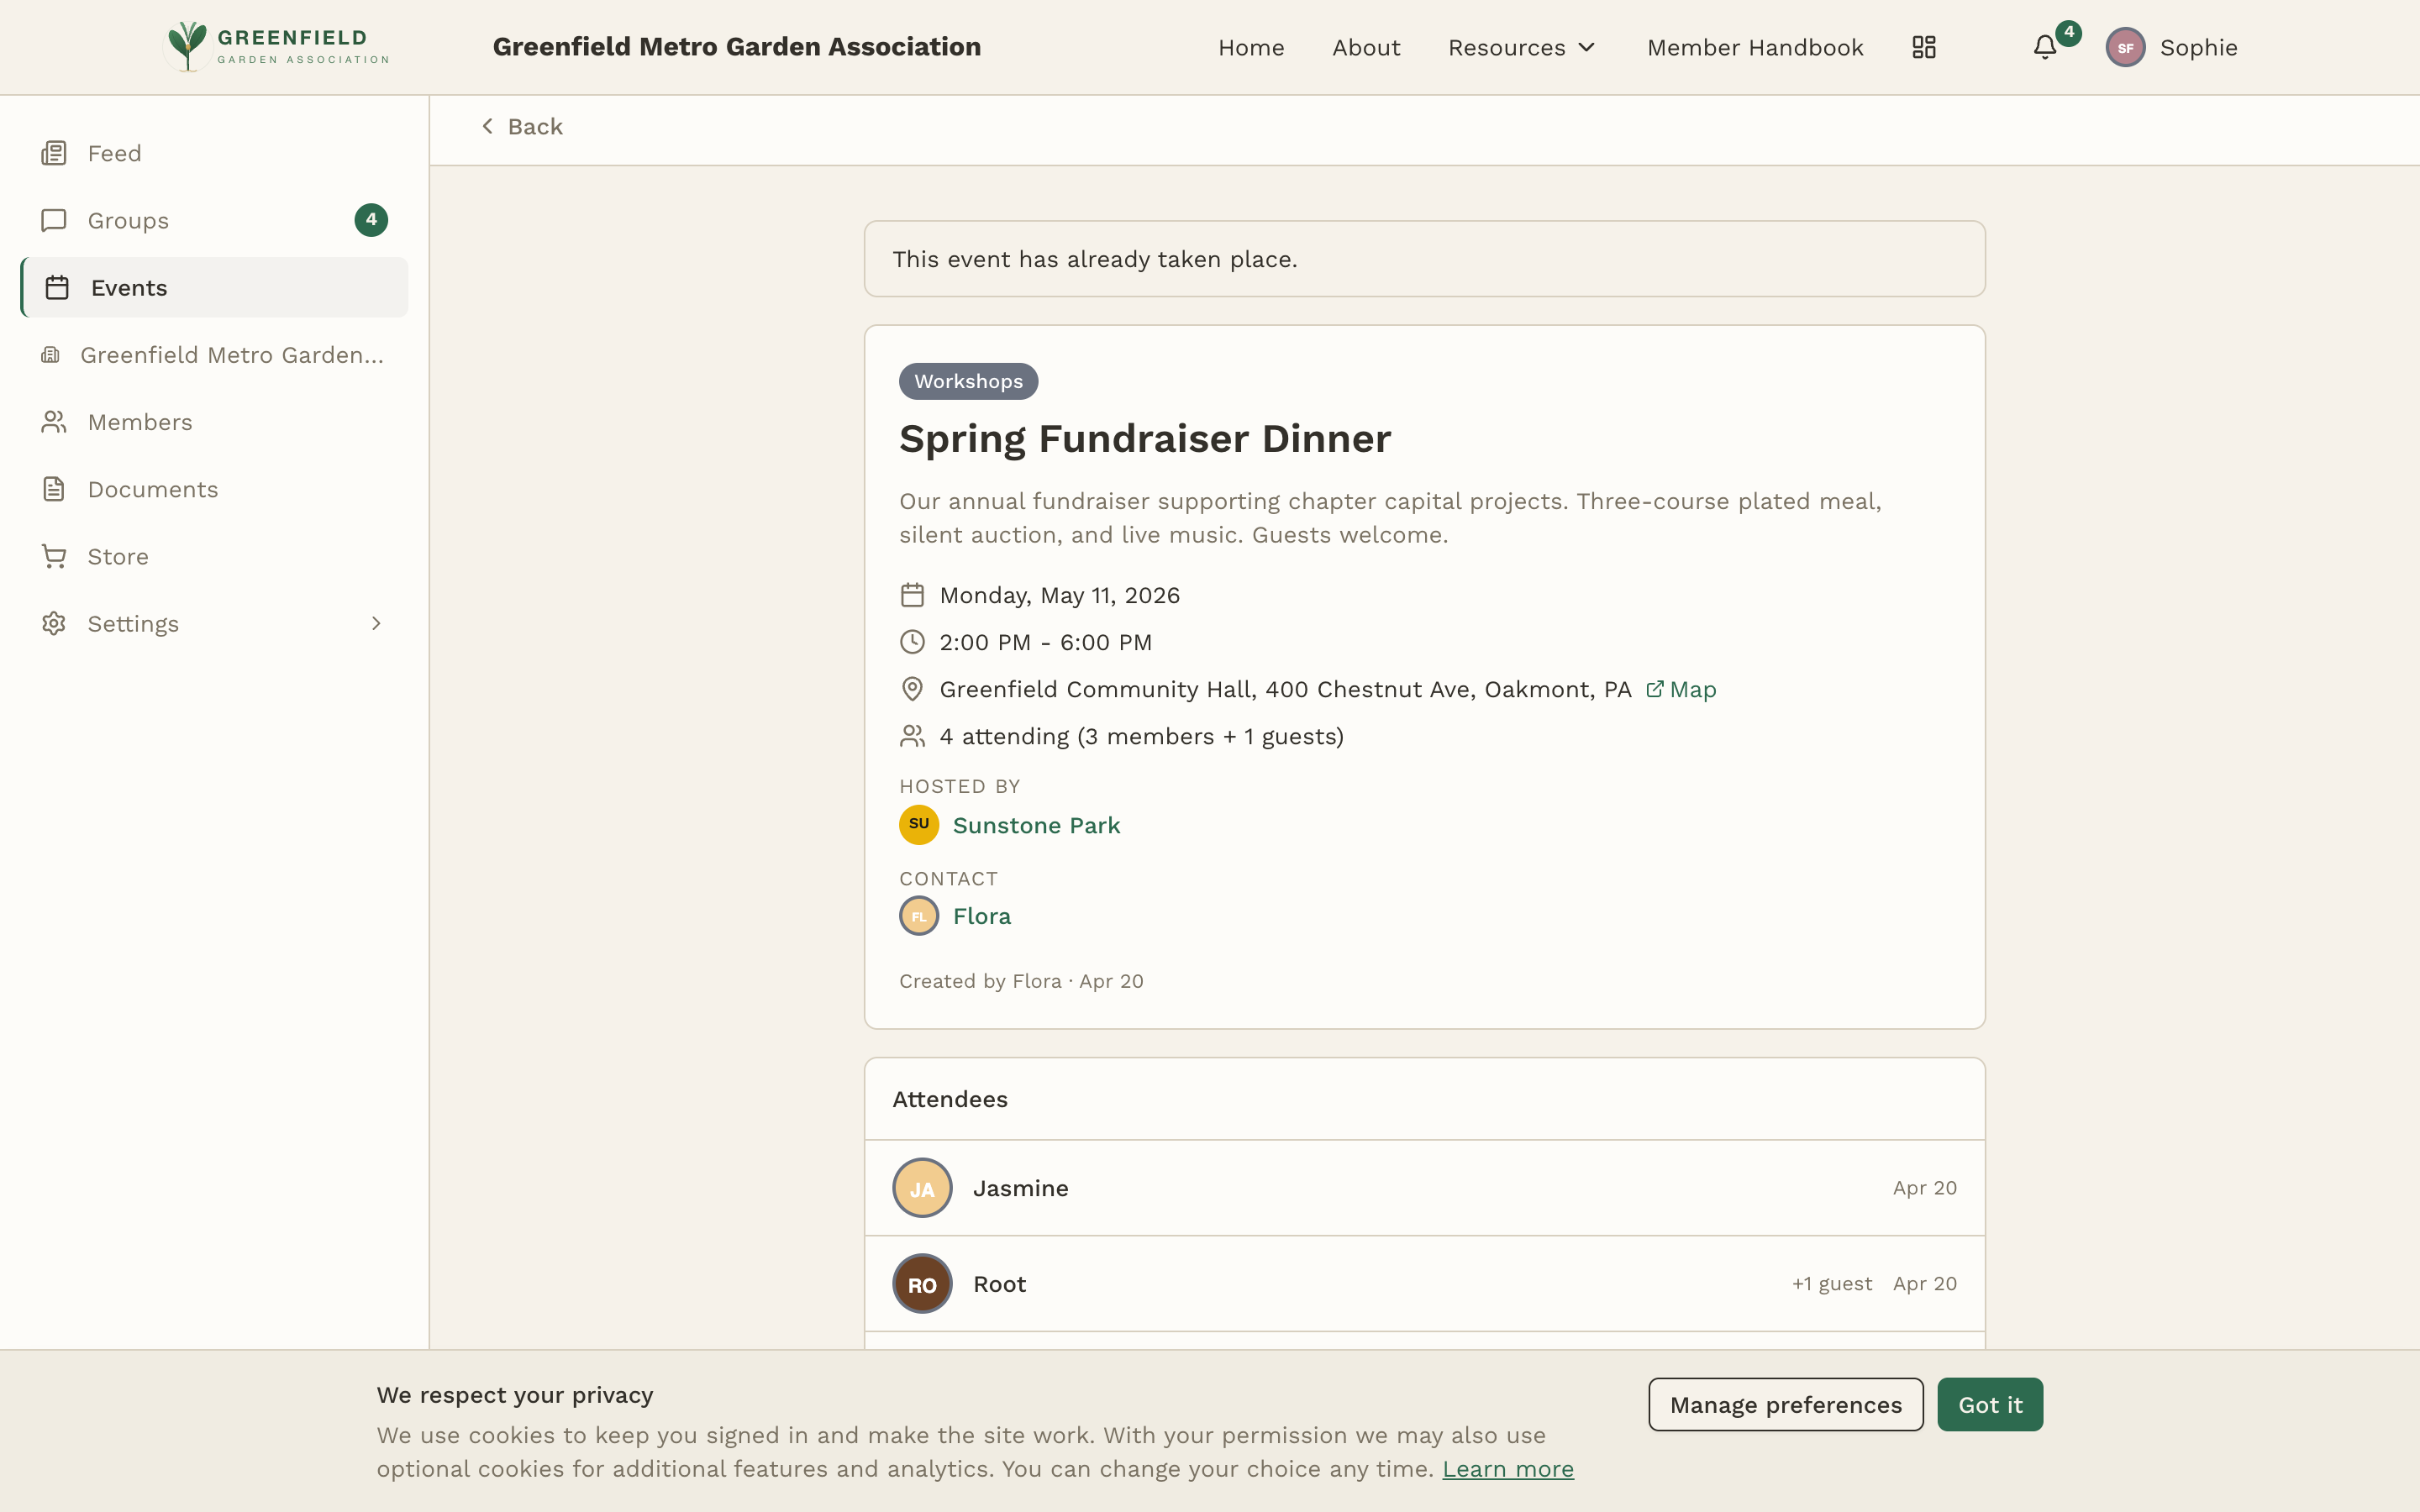
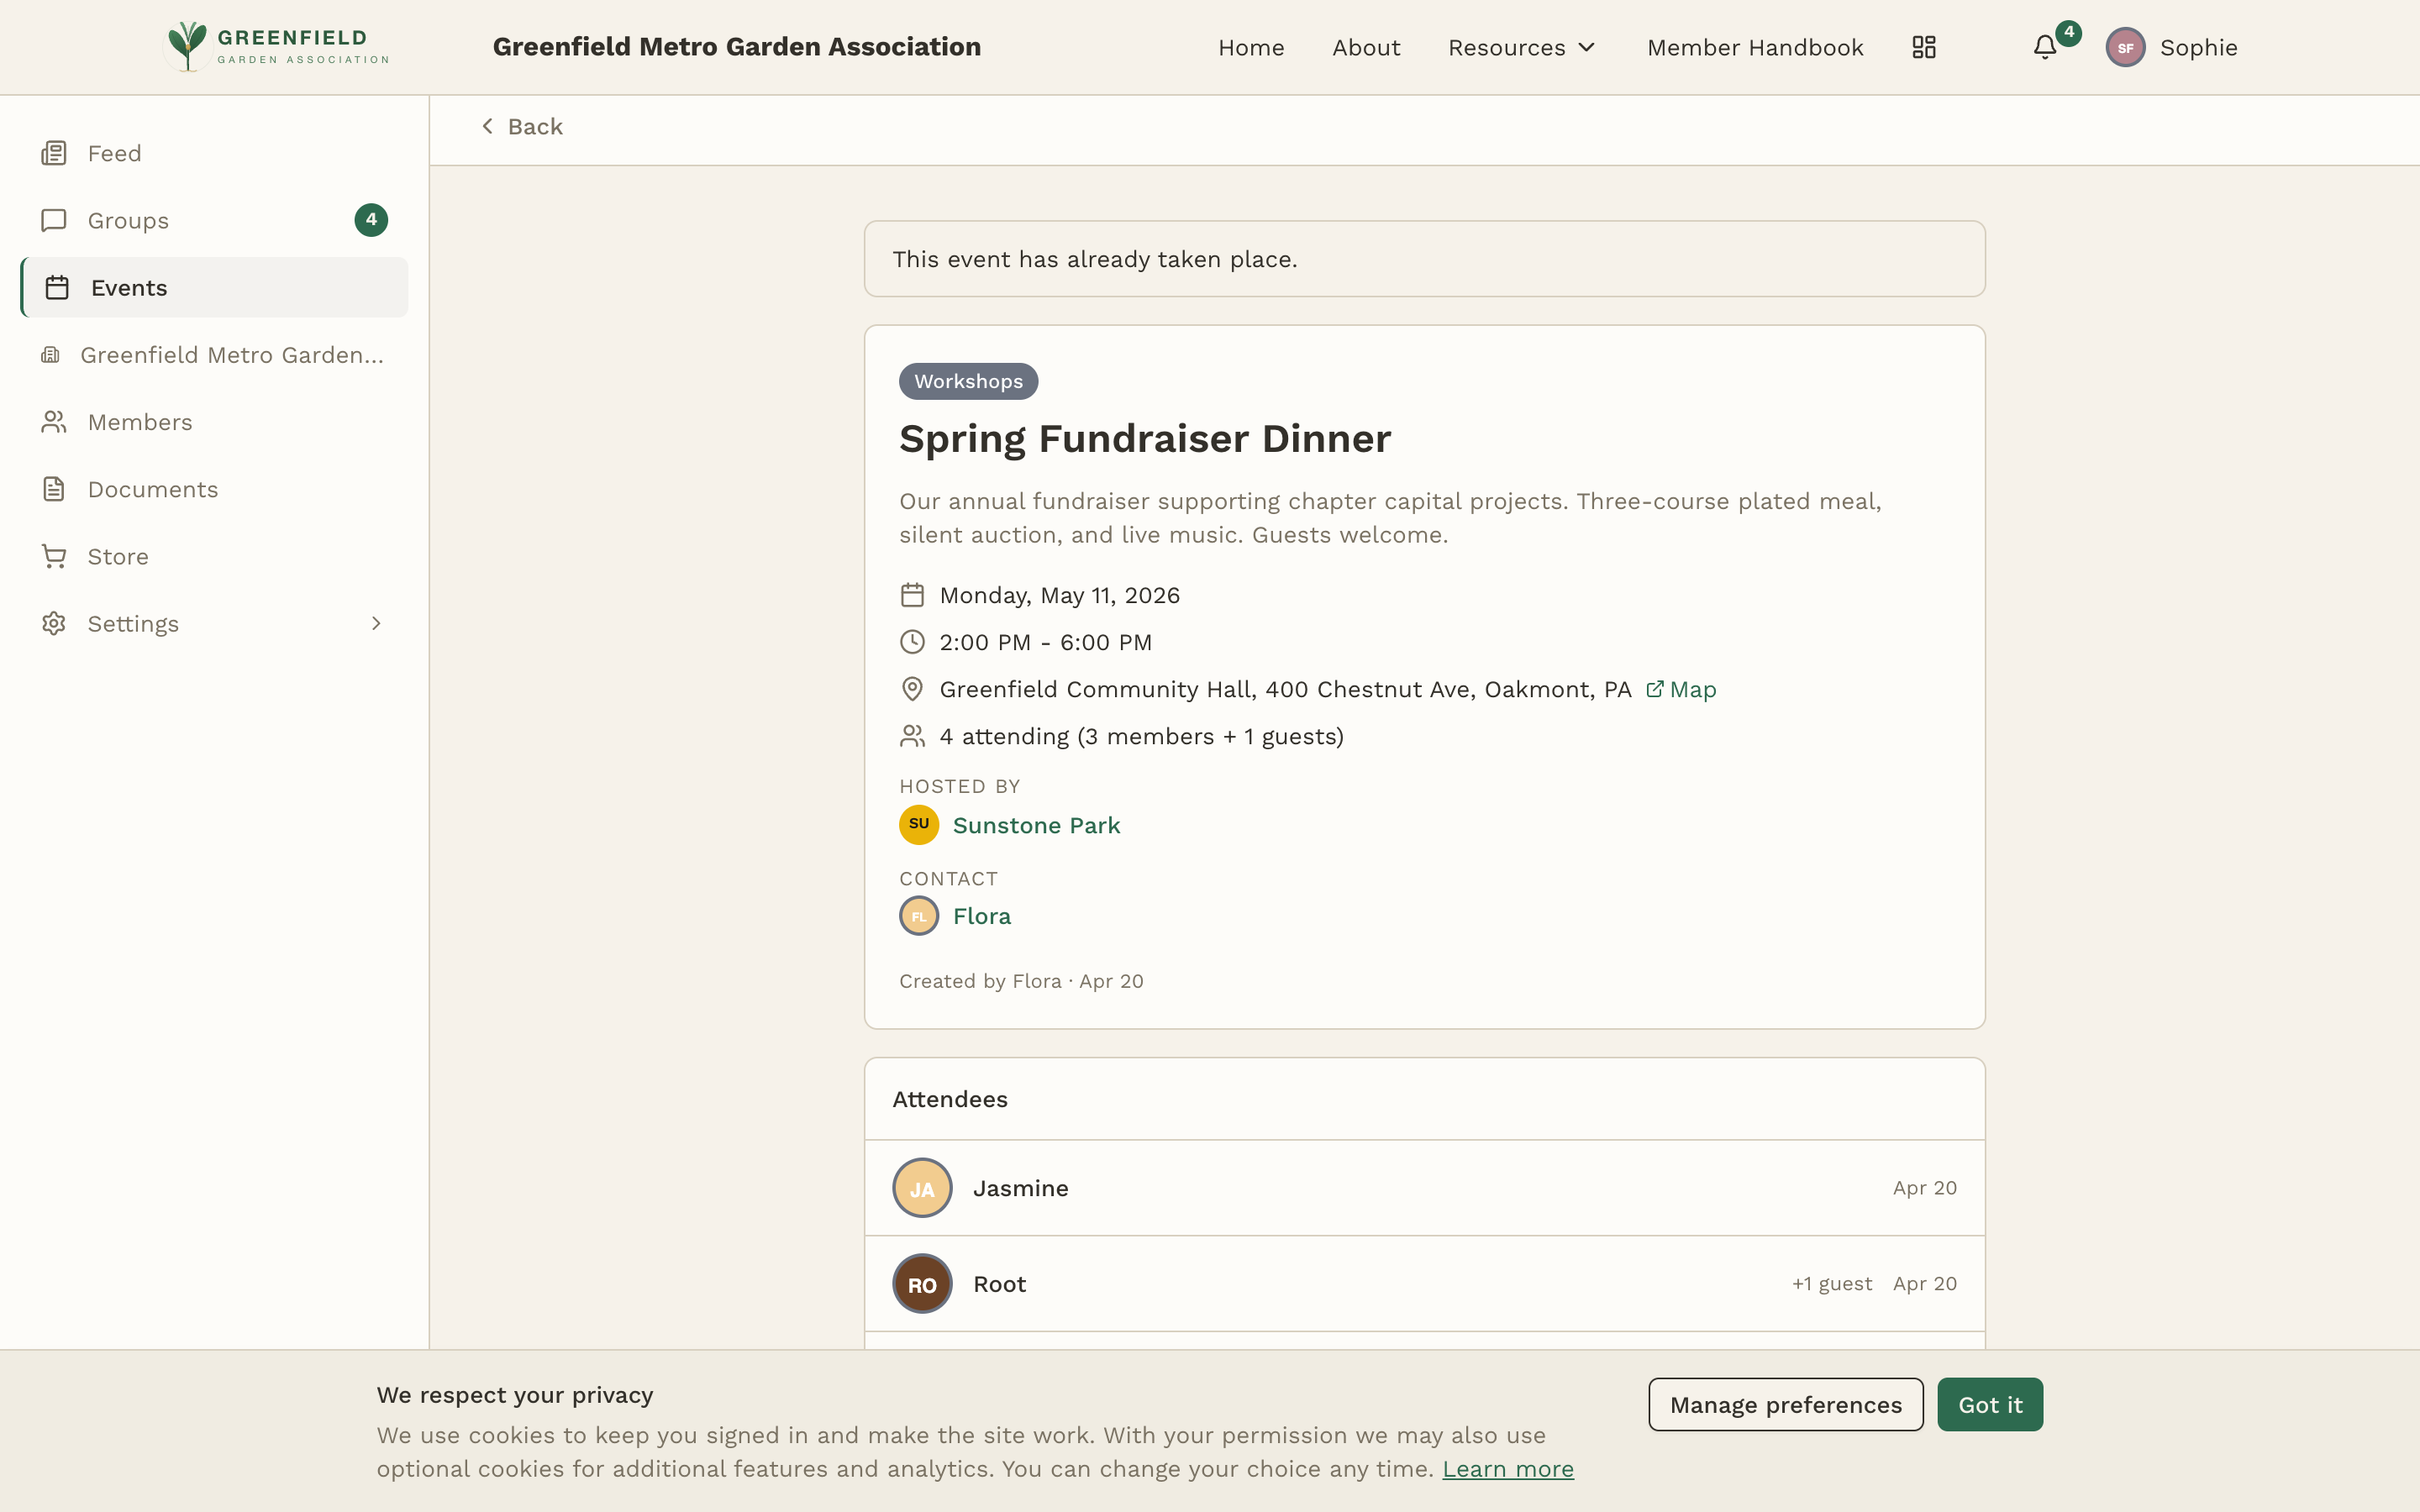
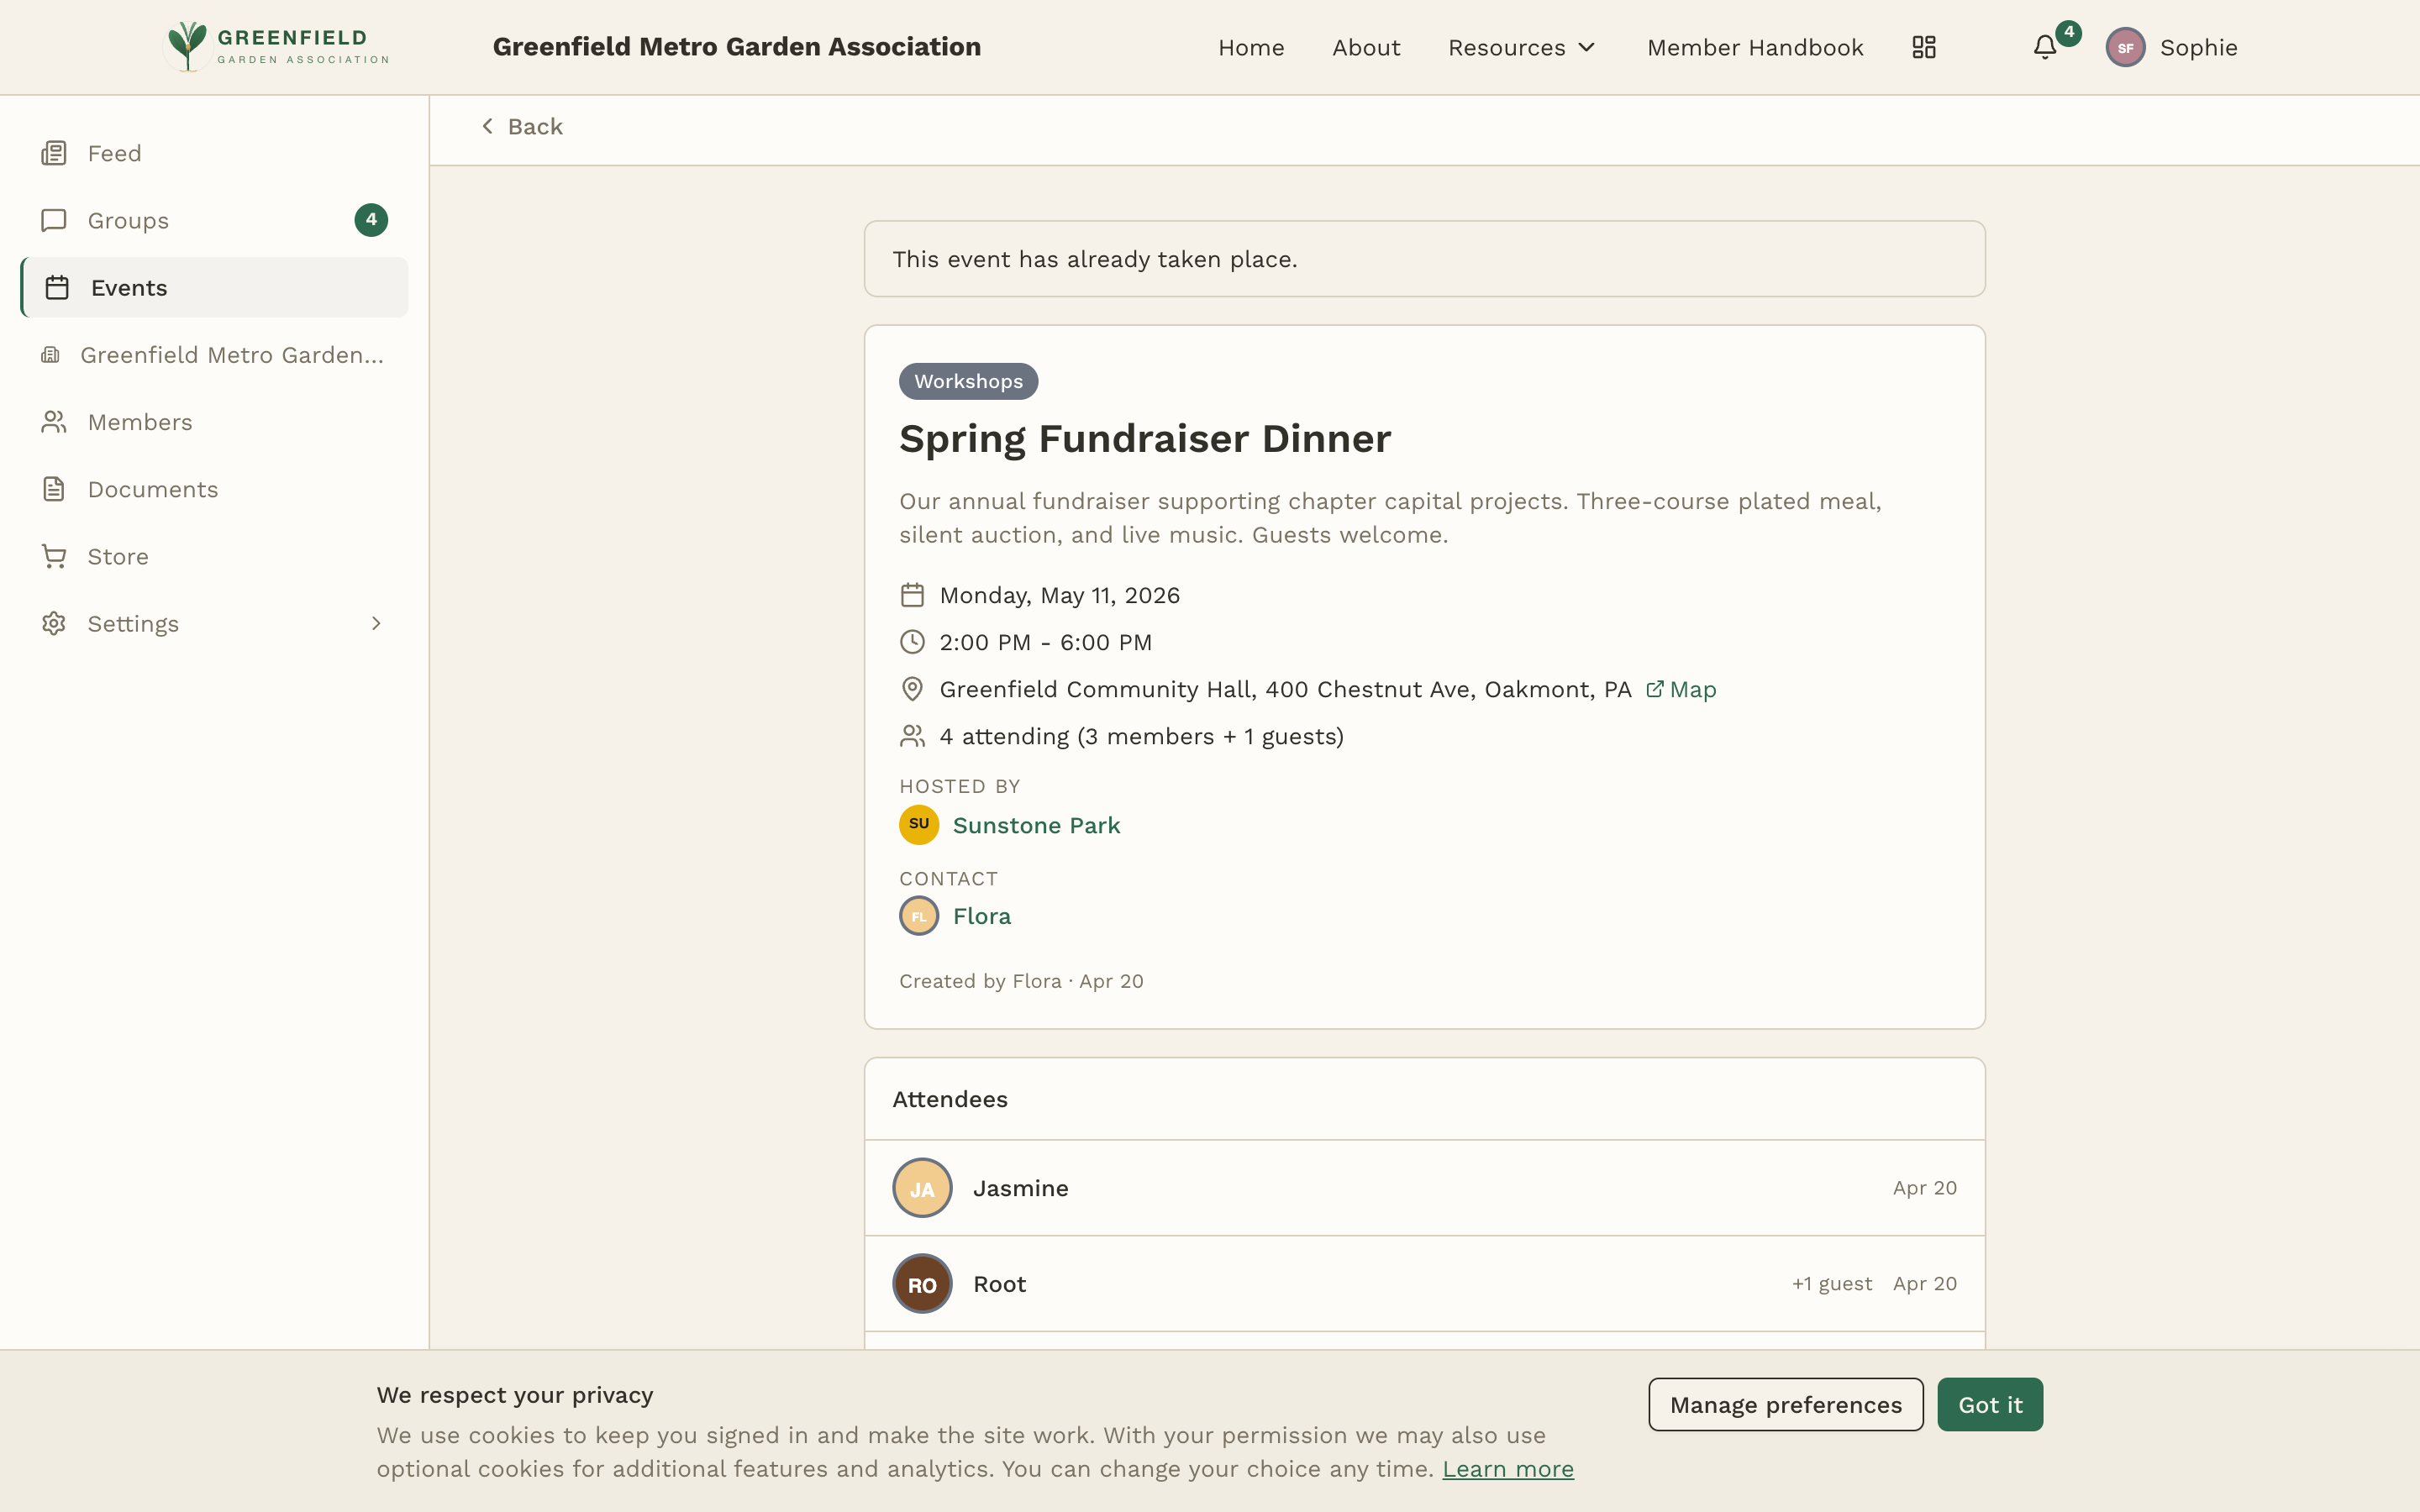
Click any event to open its detail page. You'll see:
- Category badge at the top (e.g., "Workshops," "Open Garden Days").
- Title and description.
- Date and time — day, date, and start/end times.
- Location — venue name and address, with a Map link that opens your preferred maps app.
- Join meeting link for events that include a video-call (Zoom) component.
- Attendance count — e.g., "20 attending (12 members + 8 guests)."
- HOSTED BY — the sub-org or chapter running the event.
- CONTACT — who to reach out to with questions.
- Created by — the member who set up the event, with a timestamp.
- Attendees — the list of RSVPs, with guest counts when someone is bringing a plus-one.
If the event has already happened, the top of the page shows a banner: "This event has already taken place," and the RSVP controls are hidden.
RSVPing
For free events, the right side of the event page shows a single I'm Going button. Click it to RSVP. Your name appears in the attendees list, and the event shows up in the Mine tab on the events page.
There's also an Add to Calendar button that downloads the event as an .ics file so you can drop it straight into Google Calendar, Apple Calendar, Outlook, or whatever you use.
Guests
Some events let you bring guests. When the event allows guests, you'll see the limit near the RSVP button (e.g., "Guests allowed — max 4"). After you RSVP, you can add a guest count; guests show up on the attendee list alongside your name as "+N guests" so organizers know the real headcount.
If your plans change, come back to the event page and update your RSVP or guest count. Organizers rely on accurate numbers for food, seating, and supplies — quick updates help them a lot.
Paid Events & Tickets
Some events are ticketed — your organization is hosting the event and selling tickets through fellos. On a paid event the right side of the detail page shows a Tickets panel instead of the I'm Going button, with:
- The sales window and remaining capacity (e.g., "Sales end 5/10/2026, 8:00 AM · 50 seats remaining").
- Your ticket line — labeled with your member-type seat (e.g., "Your ticket · Gardener Seat") and marked Required if you have to include yourself in the order.
- Guest line with the per-guest price, if the event allows guests.
- A Buy ticket button (for yourself and any guests) and a Buy for another member button (to purchase on another member's behalf).
Buying a ticket for yourself
- Click Buy ticket on the event detail page. A Buy ticket dialog opens explaining: "Your self-seat is mandatory. Add any optional extras below."
- Your own seat is already included at your member-type price. If guests are allowed, bump the guest count up to the per-attendee max the organizer set.
- Check the Total attendees and Total lines, then click the Buy/checkout button to pay. Tickets are sold through the same Stripe checkout the Store uses — your card goes directly to the organization hosting the event.
- After payment, fellos shows a "You're in!" confirmation with your ticket QR code, the party size, and an itemized receipt.
The organization hosting the event sells the ticket — payment goes to the Club, not to a specific person. Your organization's Comptroller is the role that set the event up for ticketing on the back end, but you don't need to go through them to buy. Just click Buy ticket.
Buying for another member
The Buy for another member button is available to every member — it's not officer-only. Use it when you're covering a ticket for someone else (a spouse, a new member who hasn't set up their payment, etc.).
- Click Buy for another member. The dialog explains: "The recipient's ticket and self-seat price are resolved from their member type." That means the price is set by whatever their member type is, not yours.
- Pick the person in the Recipient member dropdown.
- Click Reserve ticket and complete checkout. The ticket is issued to the recipient and they appear in the Attendees list.
Your ticket and check-in
After purchase the confirmation page shows your ticket QR code with the instruction "SHOW THIS CODE AT CHECK-IN — Your whole party enters together on this one code." One code covers everyone in your order (you plus your guests) — event staff scan it once on arrival.
You can come back to the QR at any time from the confirmation page's View ticket link, which opens a full-page EVENT TICKET view with the code, the event details, your party size (e.g., "For Jasmine · party of 2"), the itemized receipt, and a Print button if you'd rather bring it on paper. Once you have been checked in, the page says so under the code, with when and by whom — for example "Checked in Mon, Sep 28, 11:42 AM by Thomas Jarrell".
Keeping the ticket in Apple Wallet or Google Wallet
Underneath the QR on the View ticket page are buttons that save the ticket to your phone's wallet, so it sits alongside your boarding passes and store cards instead of living in a browser tab:
- Add to Apple Wallet — shown on iPhones, iPads and in Safari. If you are on an Android phone or a desktop browser other than Safari, this button will not appear, which is expected.
- Add to Google Wallet — shown to everyone.
The saved pass carries the event name, the start and end times, the location, your name and your order reference, and it carries your ticket's check-in QR, so you have the details and the code to hand without opening fellos.
Show your ticket's QR in whichever form is handiest: on the View ticket page, in your Apple Wallet or Google Wallet pass, or on the printout. Each one carries your ticket's check-in code, and event staff scan it once for your whole party.
The wallet buttons are deliberately left off the printed version — if you use Print, you get the ticket and its code, not the badges.
Attendee list
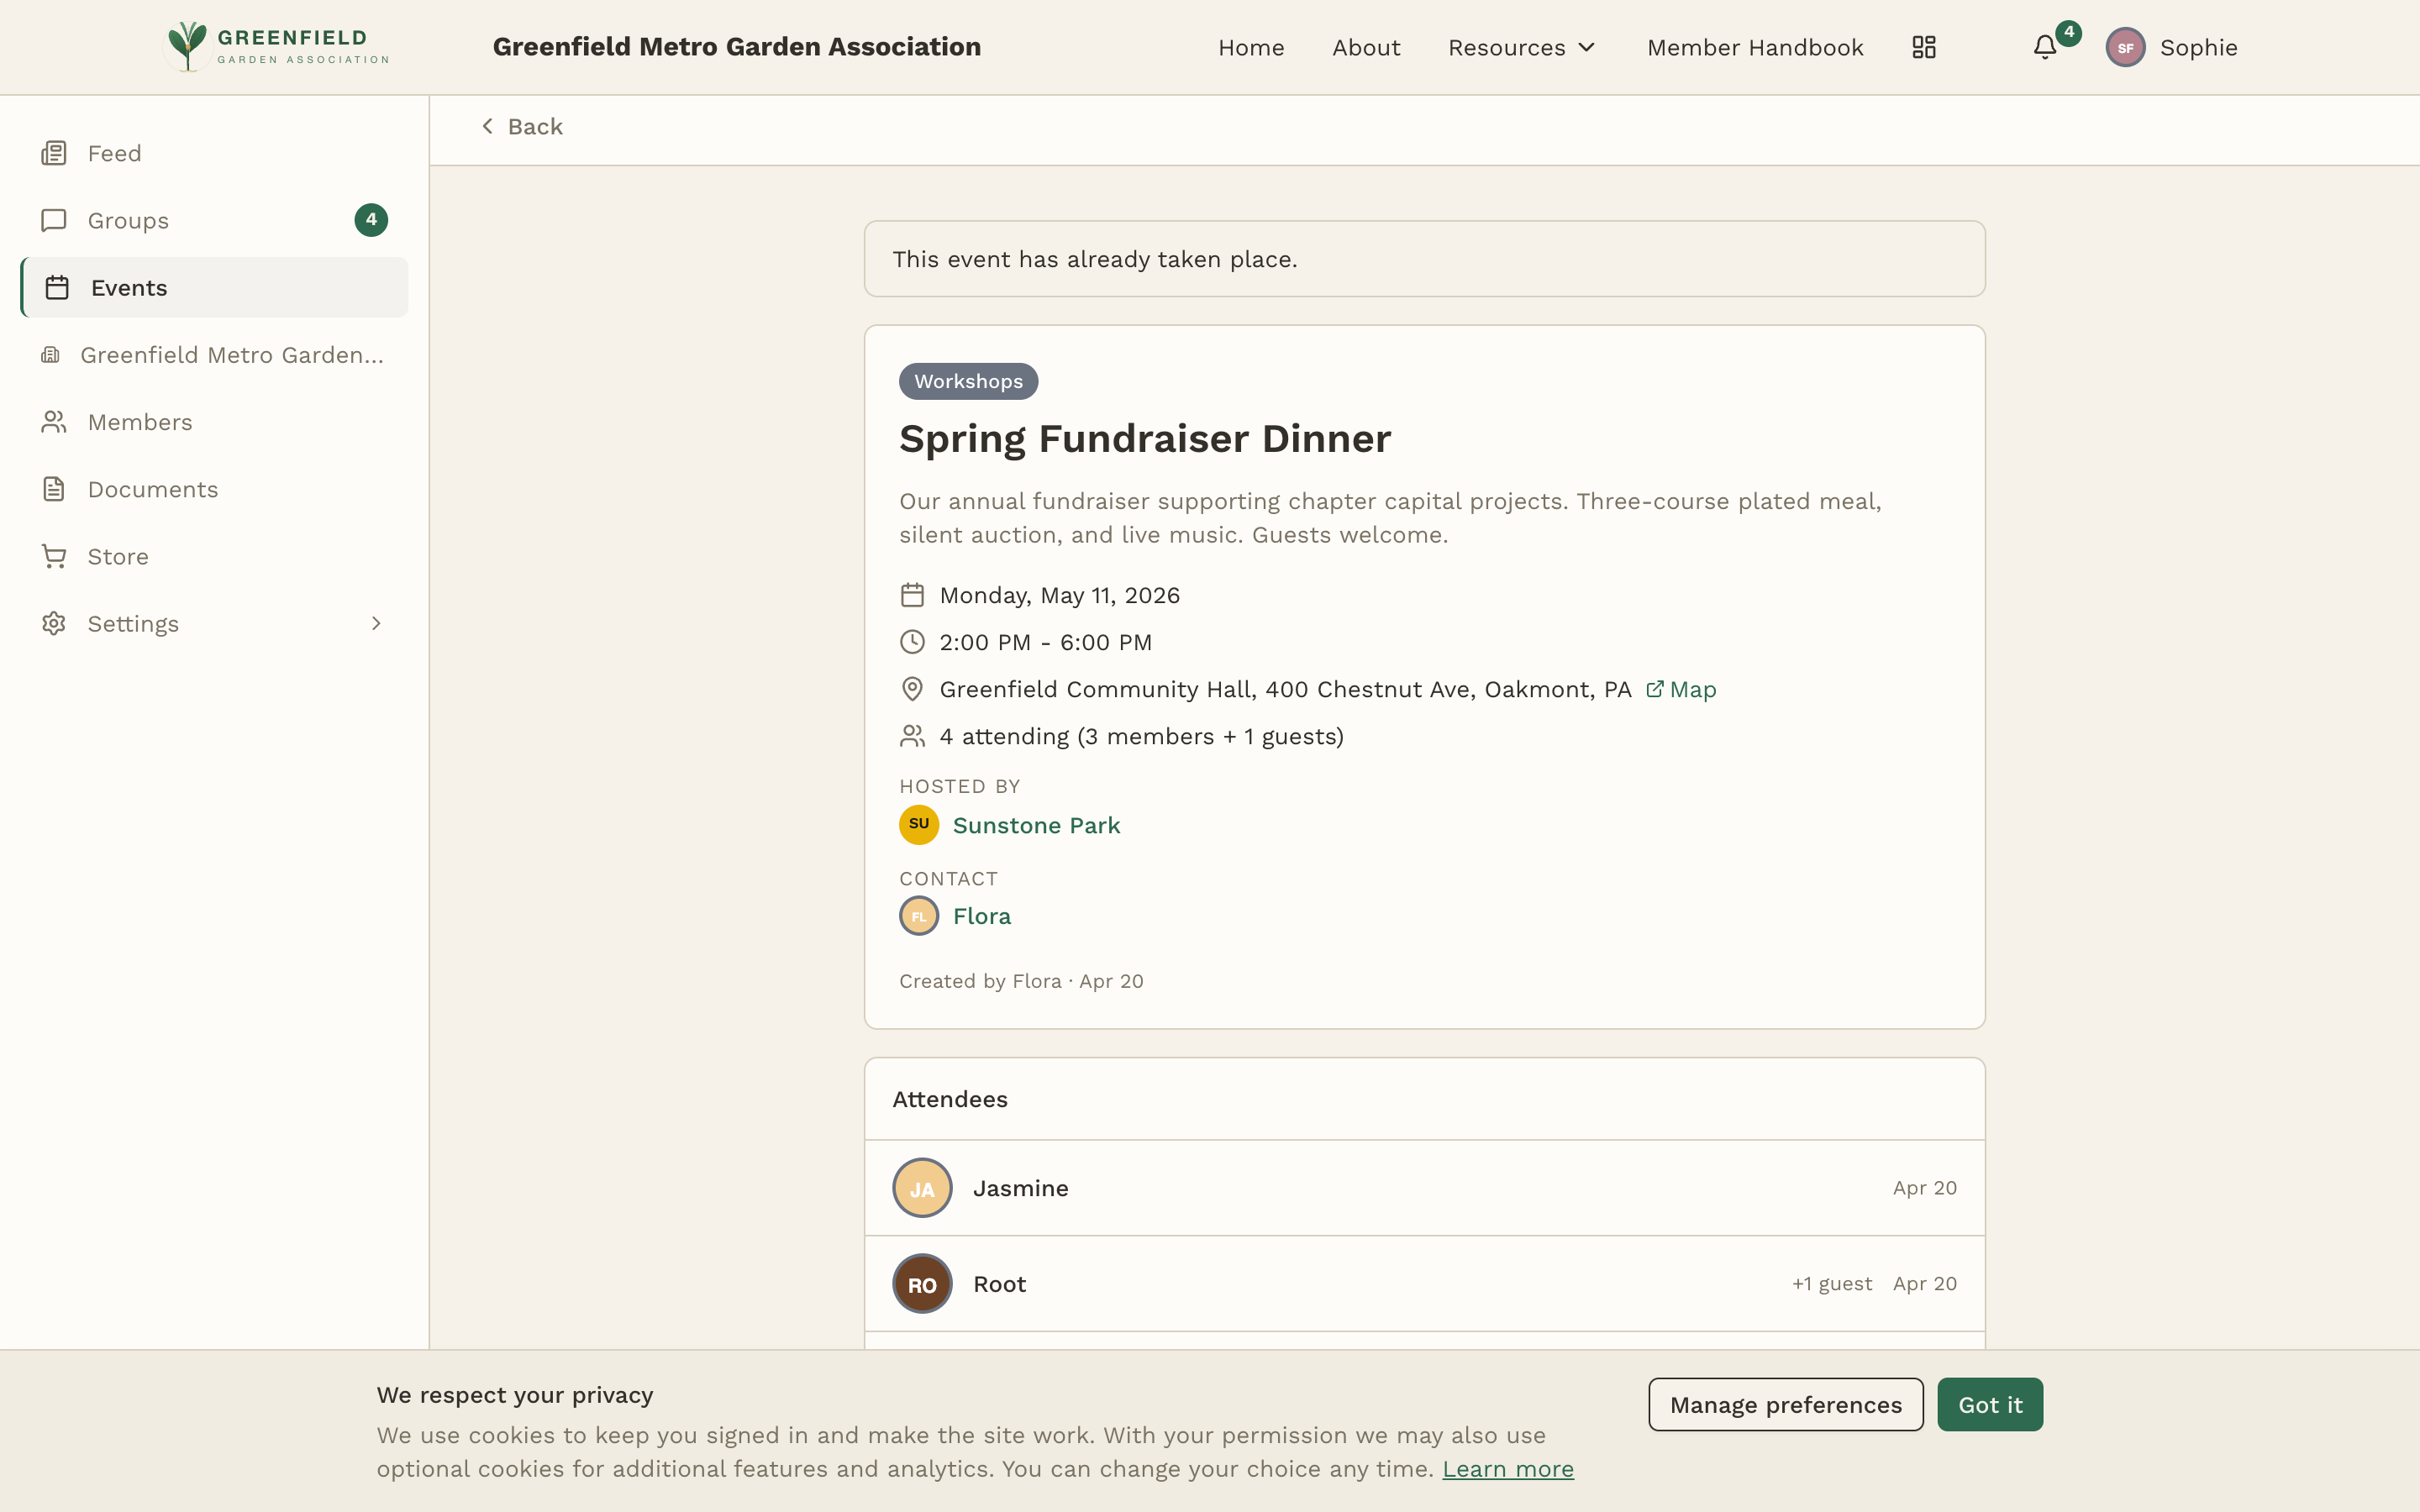
After you (or anyone else) buys, the event page updates. The header shows a running count — "3 attending (2 members + 1 guests)" — and the Attendees section at the bottom lists each ticket holder with how many guests they're bringing (e.g., "Root +1 guest"). That's the source of truth for who the organizer is expecting.
Refunds are handled by your organization, since the organization (not fellos) took the payment. Reach out to your chapter's Comptroller — they have the back-office view of ticket sales and can issue a refund through the same checkout.
Creating an Event
Any member type with event-create permission can set up events. Event creation is a member-level capability in fellos — not just for officers or admins — though your admin controls which member types have it turned on. If it isn't enabled for your type, the create controls won't appear.
When you have permission, opening the events page shows a + New / create-event control. The creation form covers:
- Enter a title for the event.
- Write a description — what it's about, what to bring, and any other context attendees need.
- Set the date and time — start date, start time, and optionally an end time.
- Add a category from the ones your admin has configured (meeting, social, workshop, open house, etc.).
- Add location details — venue name and address. The address becomes a Map link on the detail page.
- Optionally add a Zoom / meeting link for virtual or hybrid events.
- Pick a host — the sub-org or chapter running the event — and a contact person for questions.
- Set the guest policy — whether attendees can bring guests and the per-attendee max.
- Click Create Event to publish it.
Events are visible to every member who has access to the Events section. Your admin controls which member types can create and moderate events. If the create control doesn't appear for you, your member type probably isn't allowed to create events — ask your admin.
Editing or Cancelling an Event
If you created an event (or your member type is allowed to moderate other people's events), the detail page shows edit/cancel controls. Cancelling replaces the event in the calendar with a "Cancelled — Title" marker so members can still see what was on the schedule; the event is not deleted.