Approving New Members
How to review, approve, and manage onboarding requests for new members joining your organization.
When someone wants to join your organization through fellos, they submit an onboarding request. This request lands in your workflow queue, where you can review the applicant's information, ask questions, and ultimately approve or decline their membership.
Onboarding requests are one of the most common workflow items you'll handle as an admin. The process is designed to give you all the information you need to make an informed decision, while keeping the applicant in the loop through built-in messaging.
How Onboarding Requests Arrive
When someone submits a new member application, here's what happens:
- The admin submitting the request fills out the new-member form with the applicant's personal details, the organization they're joining, the member type, and (optionally) a sponsor.
- The request is saved and becomes visible to other admins whose scope covers the target organization.
- If you have notifications turned on, you may also get an email or push notification.
Reviewing an Onboarding Request
To review a pending onboarding request:
- In the left sidebar, click Workflows to expand the Workflows section.
- Click Member Requests in the list that opens beneath it.
- The page is titled Member Requests, with the subtitle "Submit and manage new member onboarding requests." It shows a New Request button, your submitted requests (an empty "No requests yet" panel until you submit one), and an Approval History list of requests that ran through you as an approver.
- Click any entry to open its detail view.
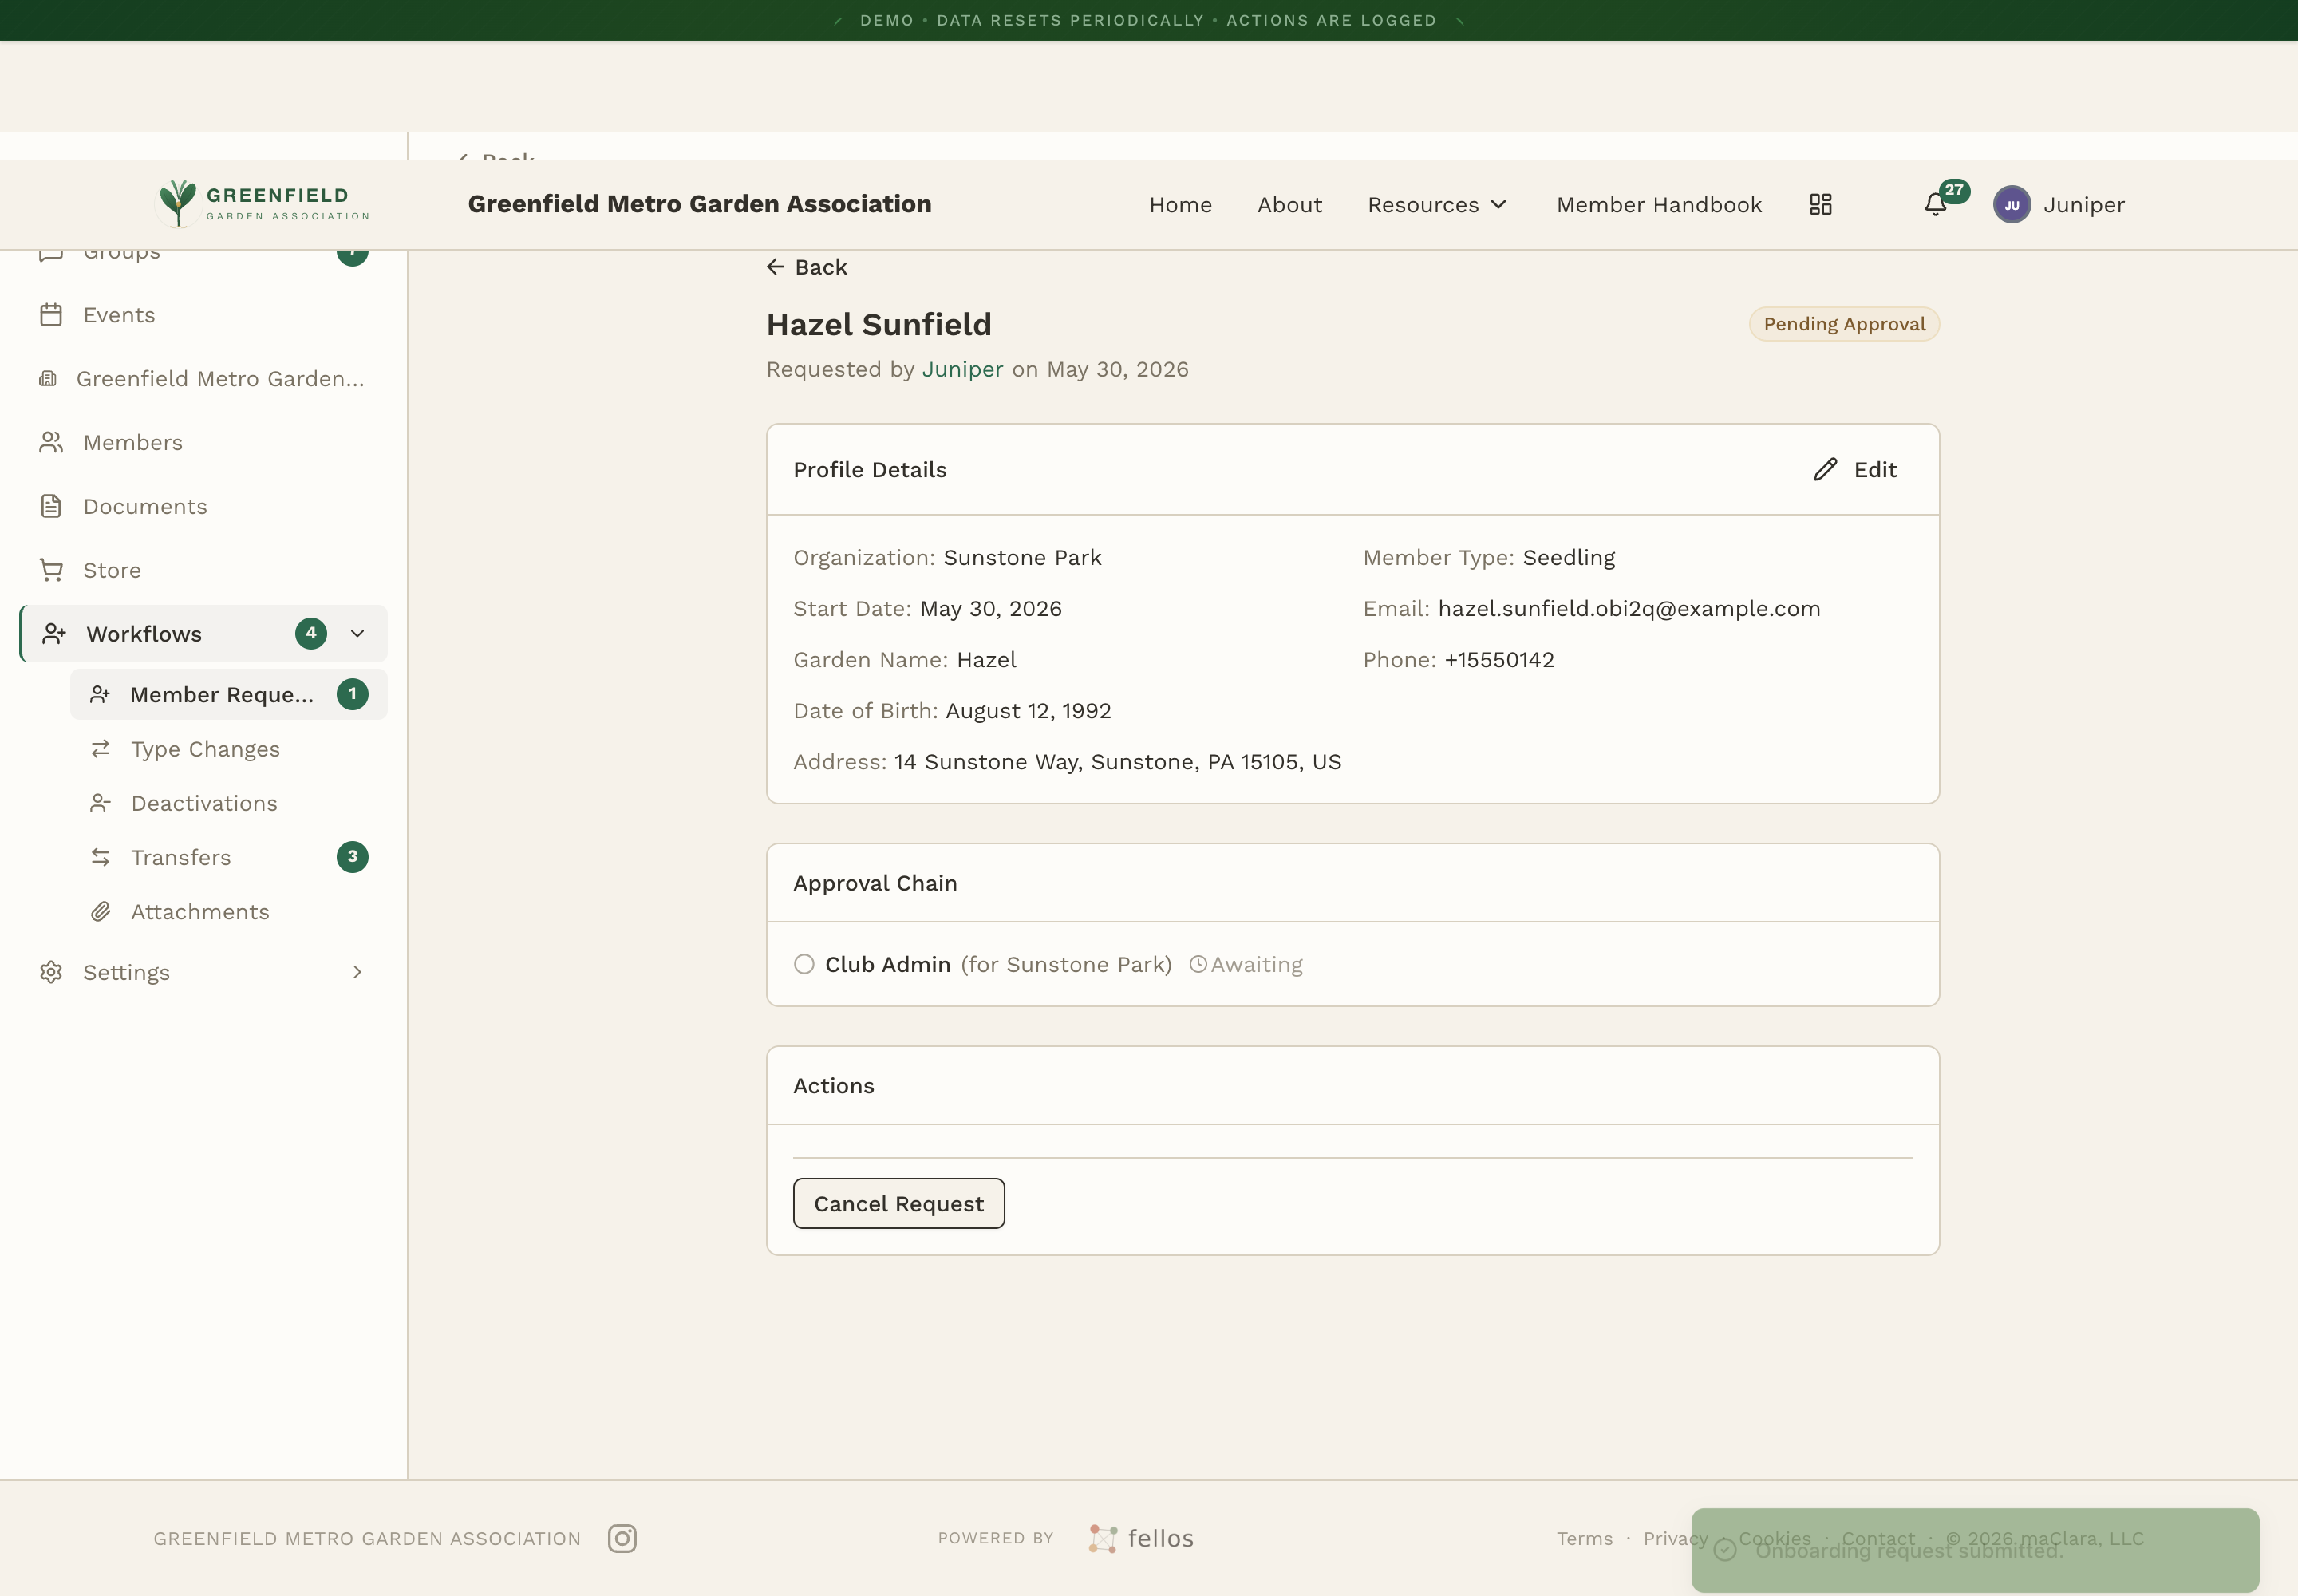
The detail view opens with the applicant's name at the top and a status badge — typically Pending Approval for a fresh request, or Invitation Sent once every step in the chain has approved it. You'll see three labeled sections:
- Profile Details — Organization, Member Type, Start Date, and Email for the applicant.
- Approval Chain — Each approval step the request must pass through, and who (if anyone) has accepted it.
- Actions — Where you'll find the action buttons when it's your turn to approve.
Submitting a New Onboarding Request
To bring in a new member yourself:
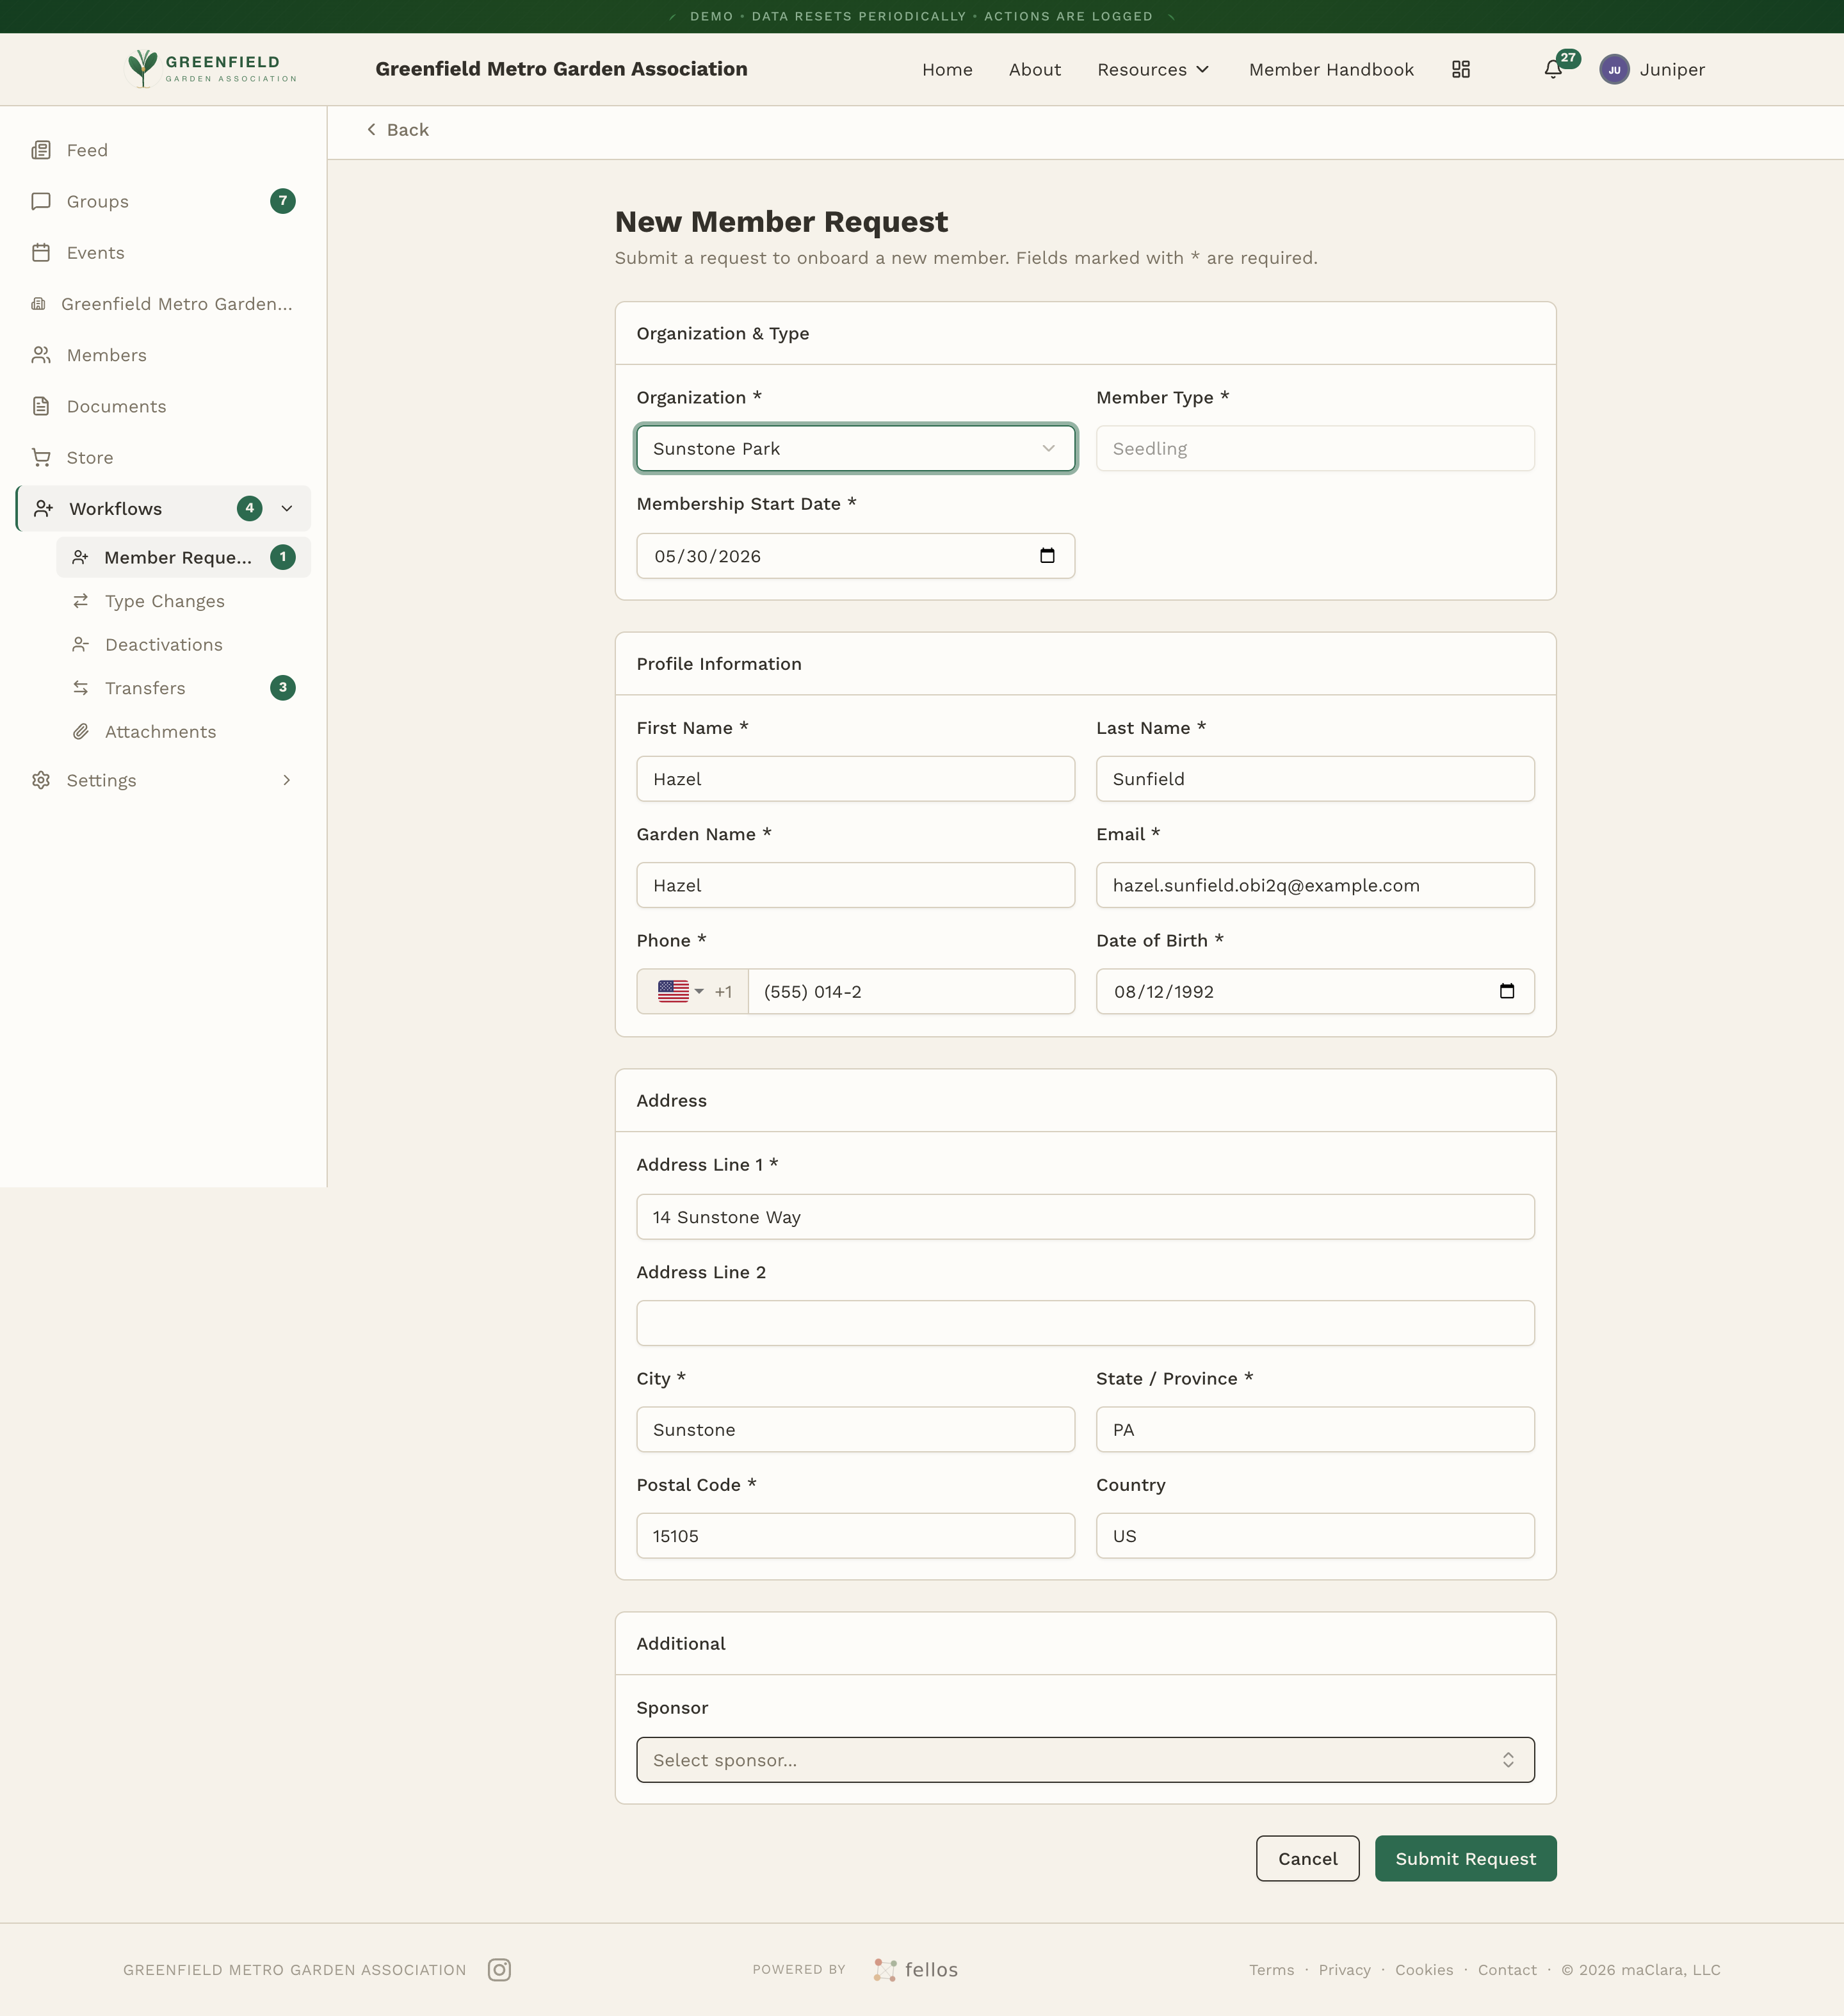
- On the Member Requests page, click New Request.
- The New Member Request form opens. Pick the target organization and member type, set the membership start date, then fill in the applicant's profile details (name, nickname, email, phone, address).
- Optionally pick a sponsor from the existing members.
- Click Submit Request.
Once submitted, you'll see the request's detail view with its status set to Pending Approval and a Cancel Request button (since you're the submitter). The request enters the Approval Chain your site admin has configured for that organization.
Taking Action on a Request
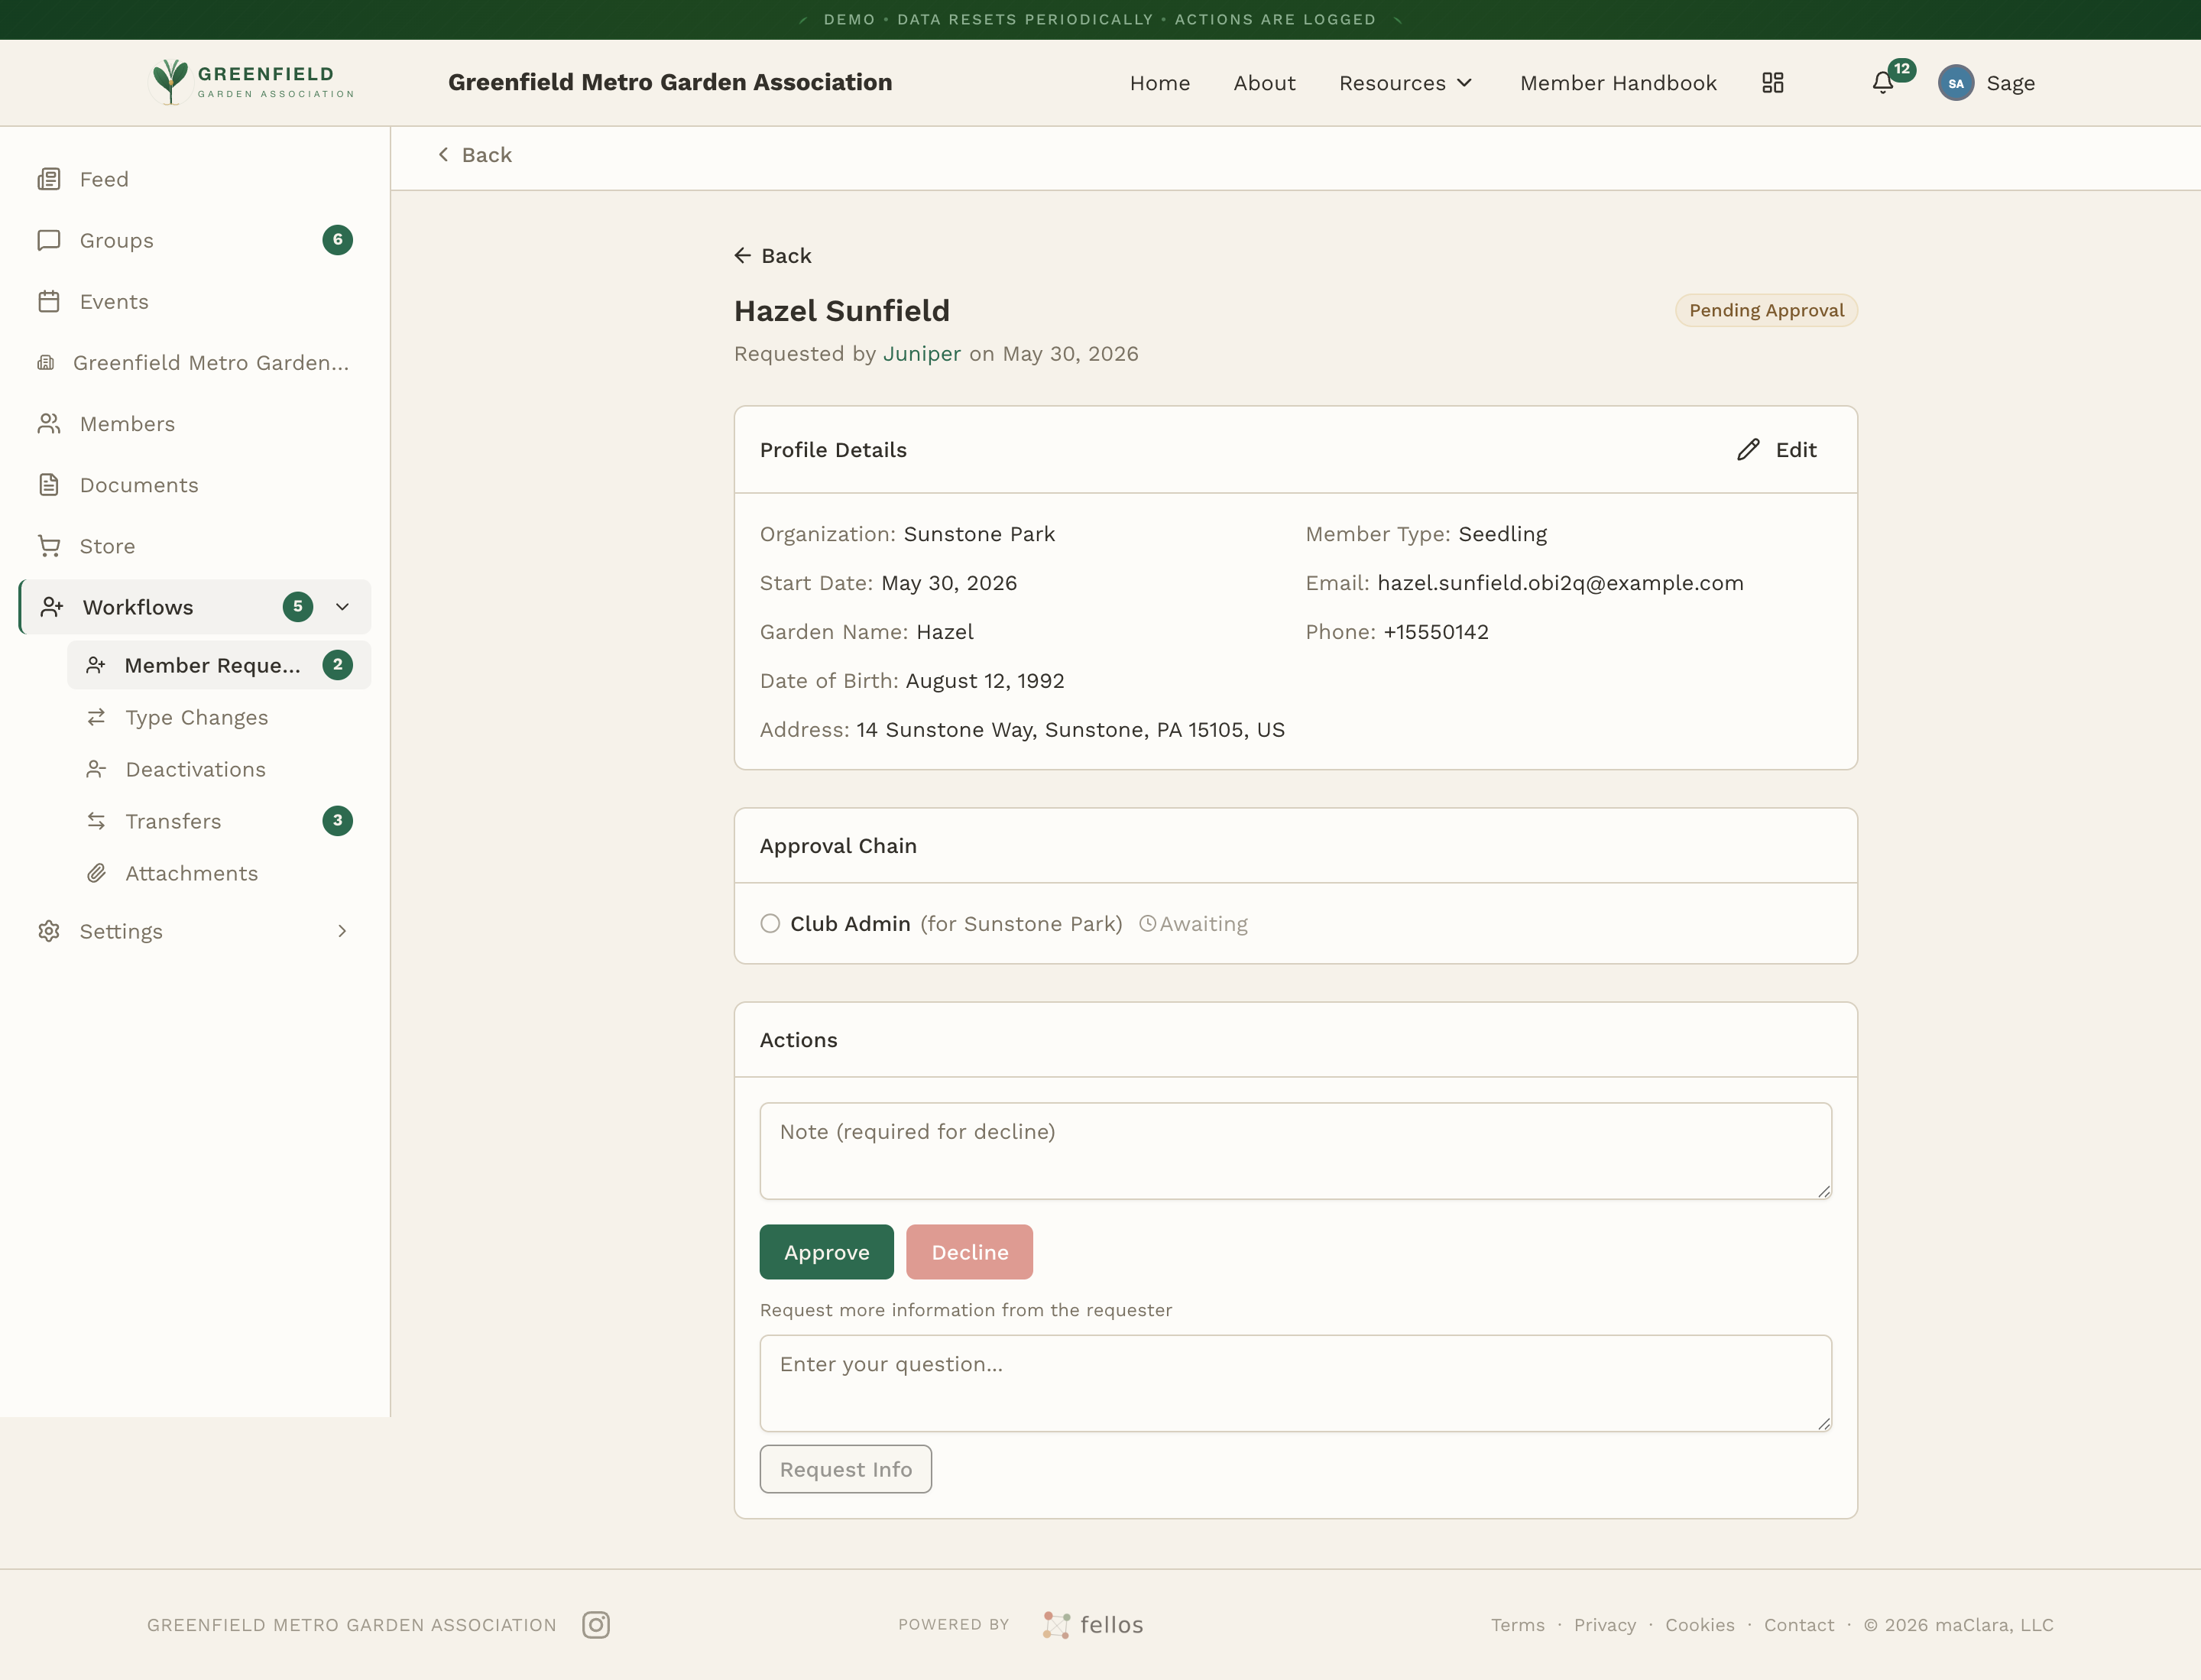
When the Approval Chain has reached your admin level, action buttons show up in the Actions section of the detail view:
- Approve — Move the request on to the next step in the chain (or finish it if you're the last step).
- Decline — Stop the request here. A note is required when you decline, so the submitter understands why.
- Request Info — Ask the submitter a question without approving or declining yet. Type your question in the "Request more information from the requester" box and click Request Info. The request stays open.
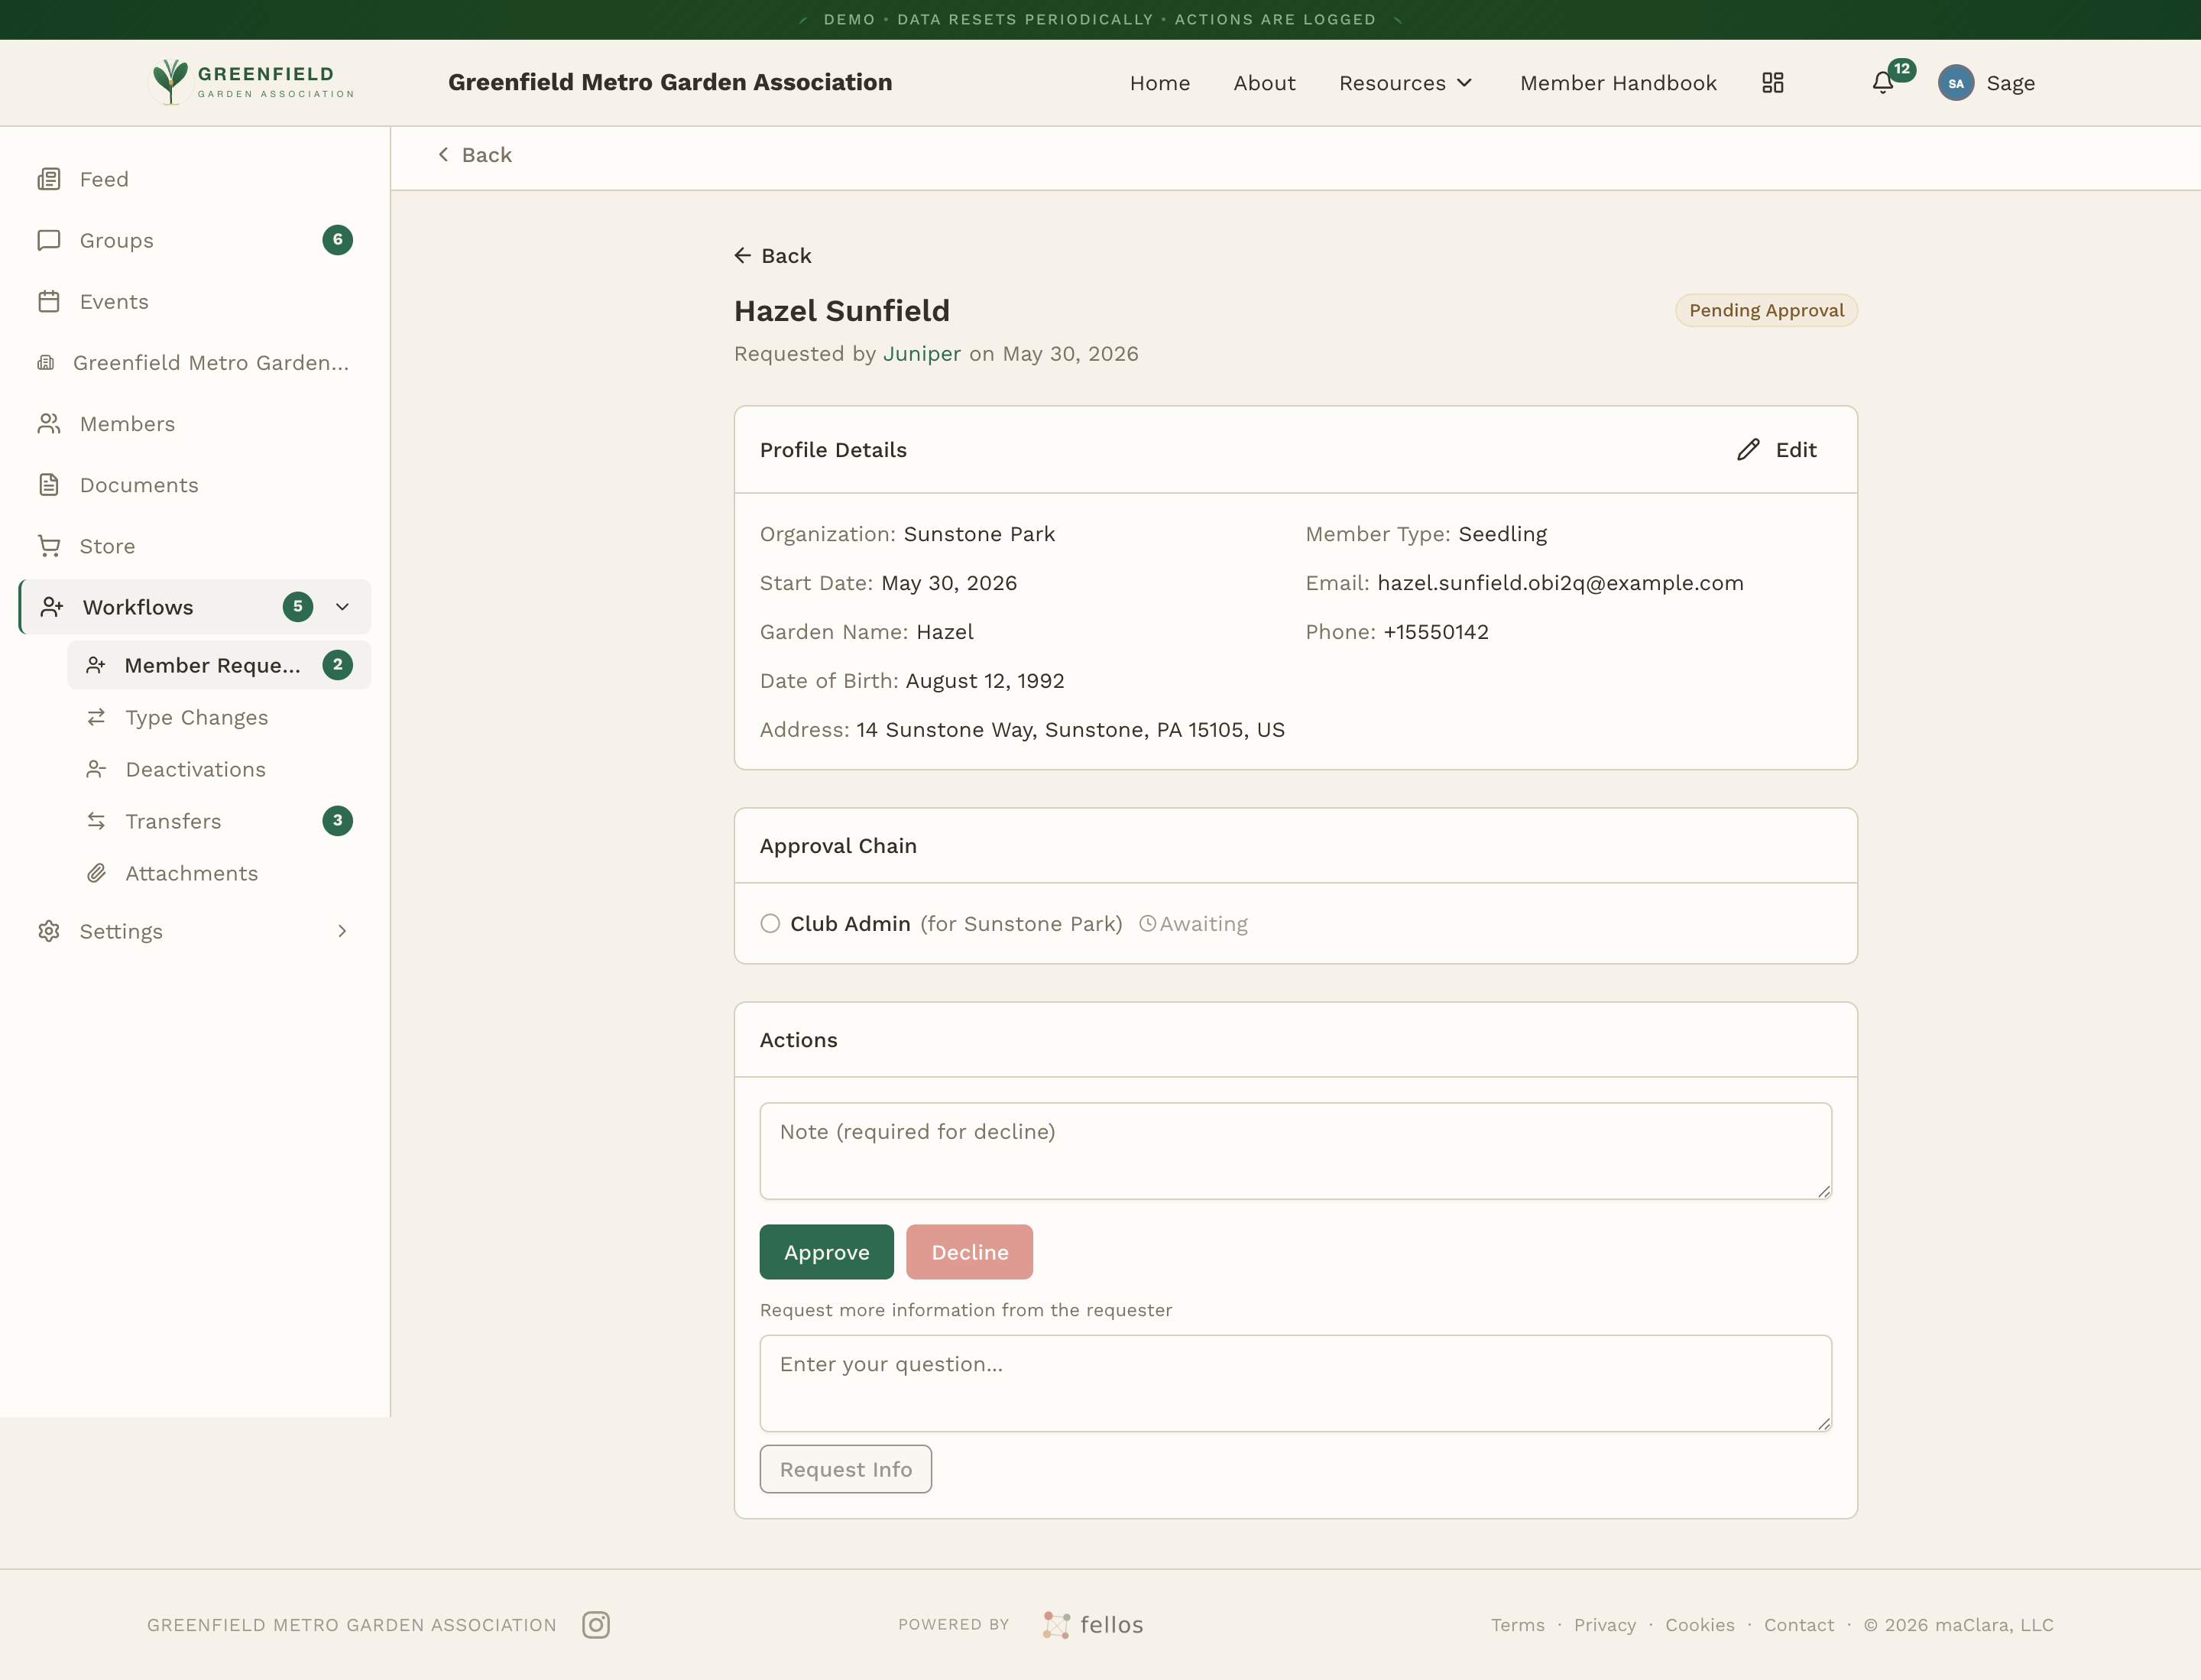
The approval process is configured by your site admin, so the exact number of steps — and which admin level has to accept each one — varies from club to club. Your step is the one labeled for your admin level (Club, Org, or Local) next to your organization.
If more than one admin has scope over a step, any one of them can act on it. Once someone approves or declines, the request moves on (or stops) for everyone else.
What Happens After Approval
Once a request passes every step in its Approval Chain, the status changes to Invitation Sent and an Invitation Link appears on the detail page. You can copy the link and share it with the new member so they can complete their registration and set their password.
If email is configured, the new member is emailed their invitation automatically. If it isn't, use the Copy or Regenerate buttons on the invitation link to send it to them yourself.