Selling Event Tickets
Charge members to attend — with tiered pricing and extras for guests.
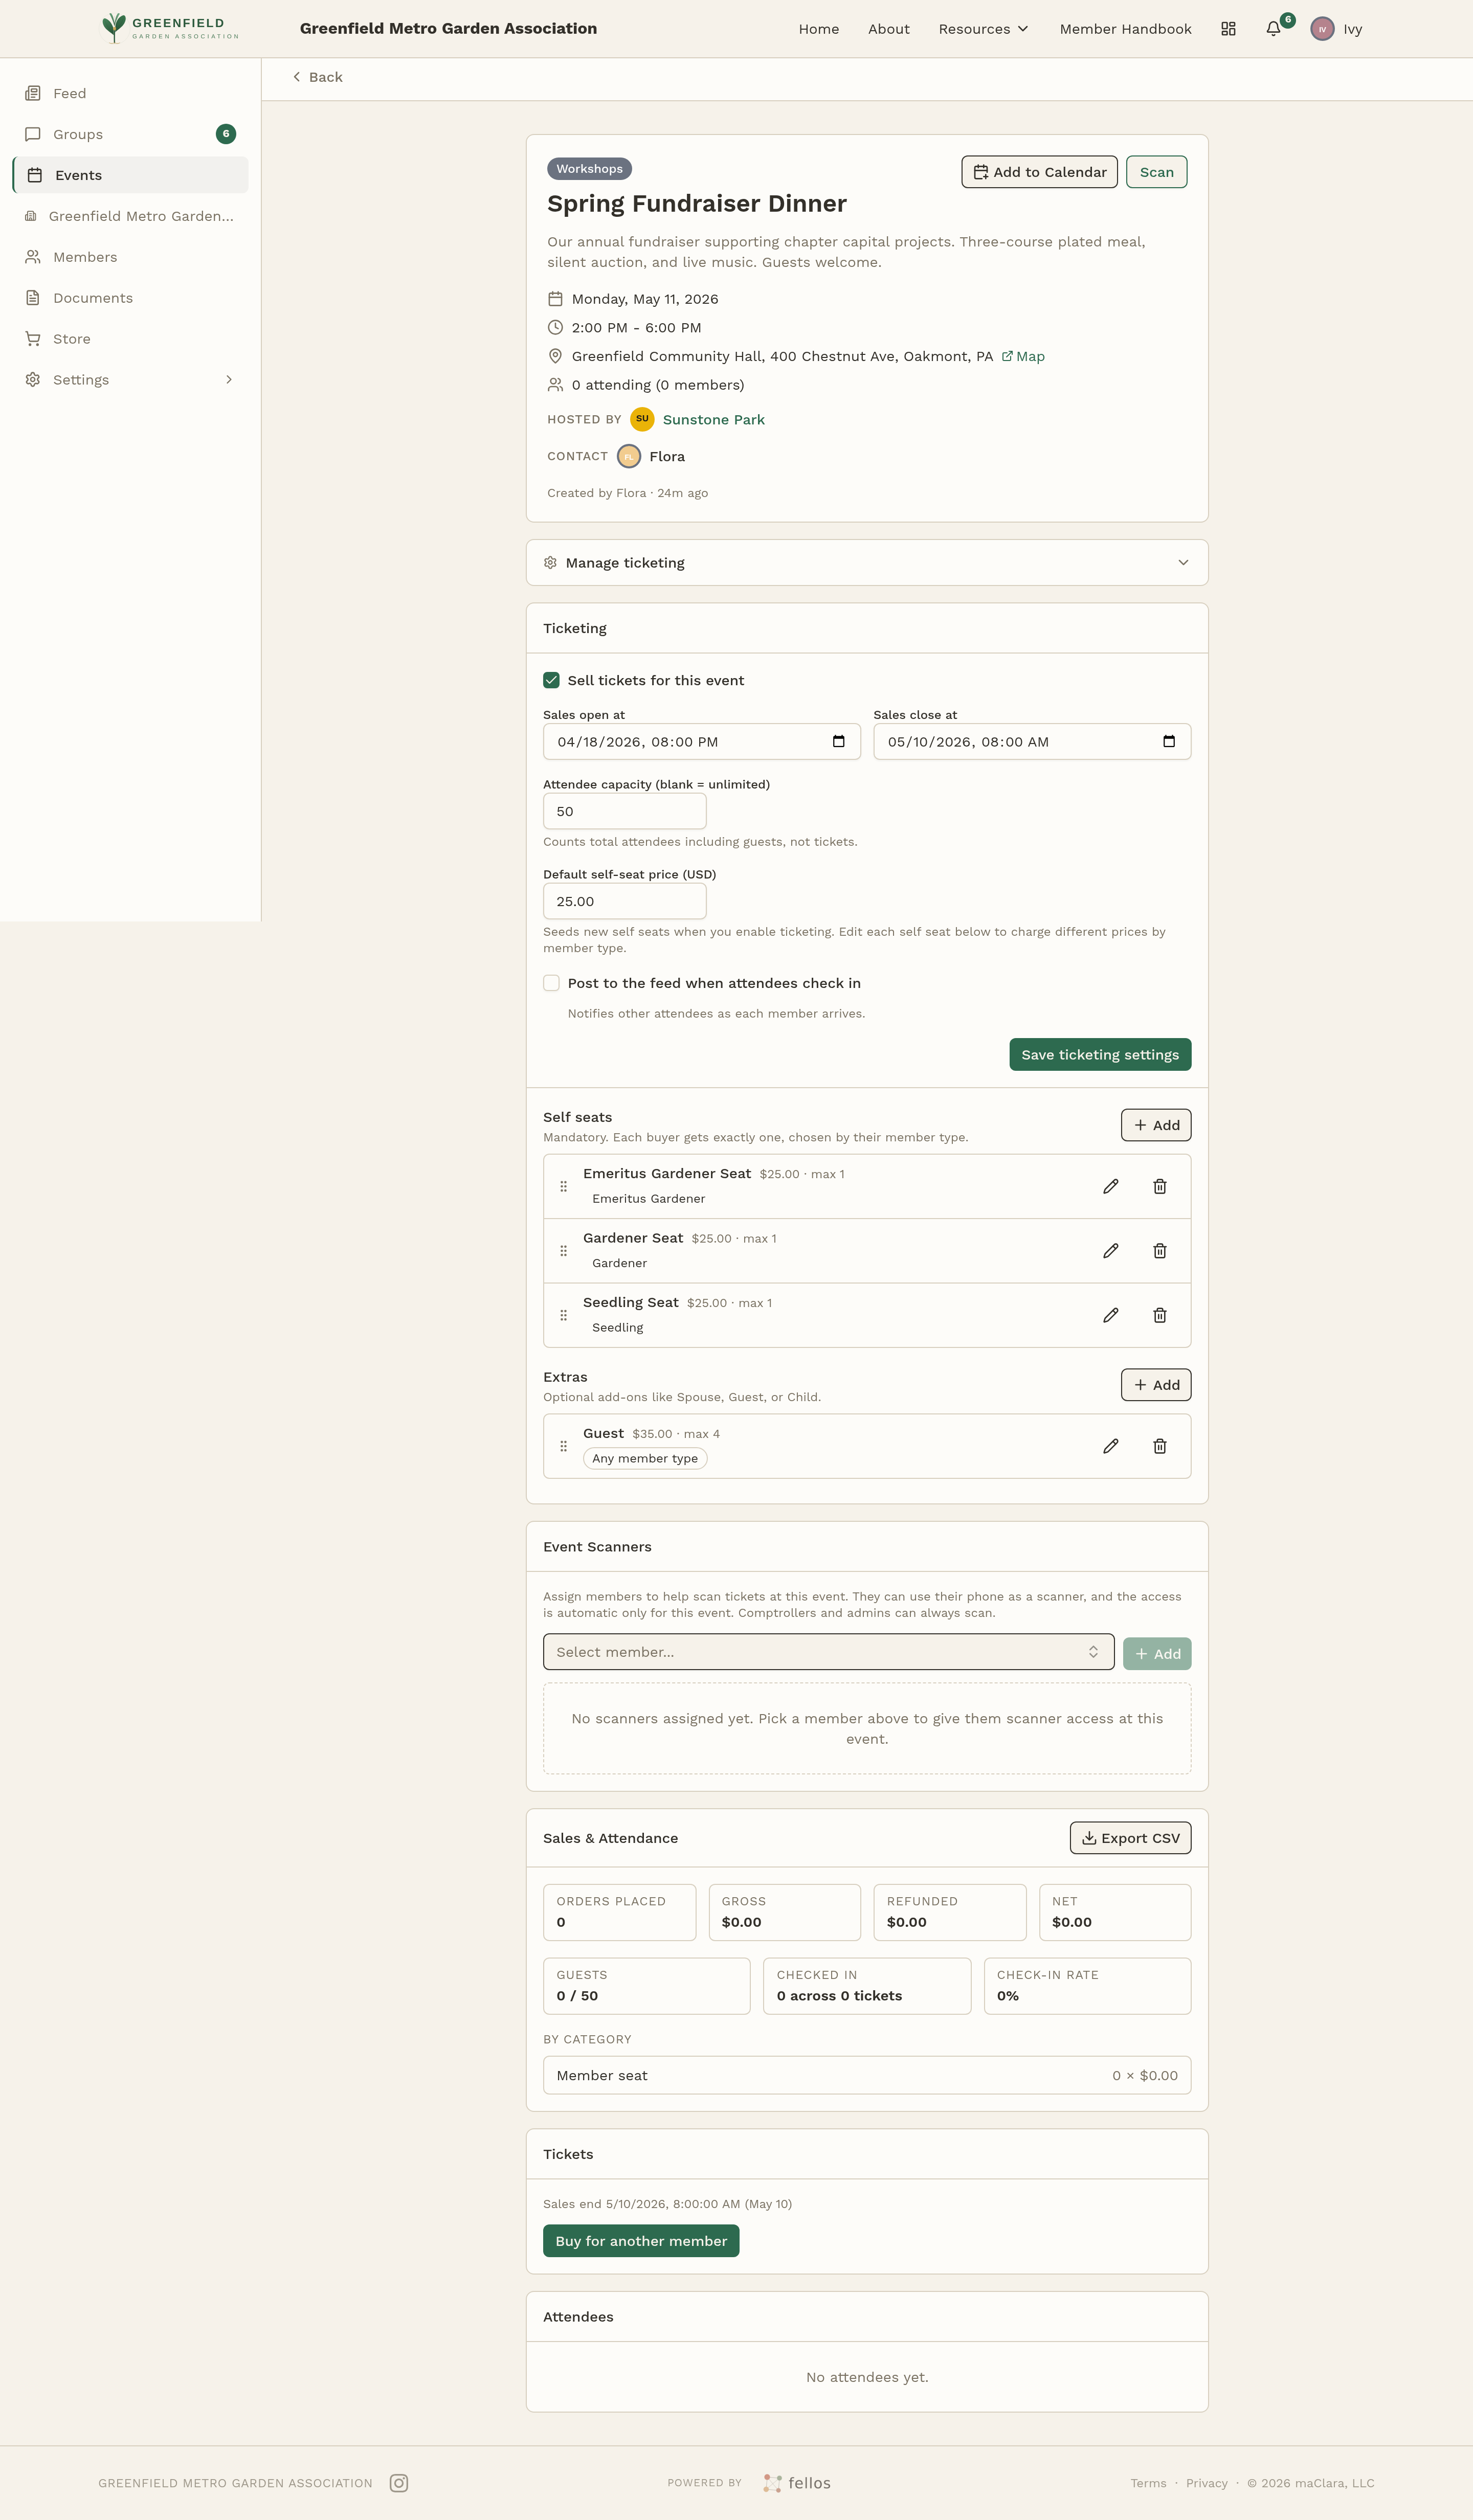
Any event in your organization can have ticketing turned on. When ticketing is on, the event page grows a Tickets panel where members buy in. You manage the whole thing from the same event page — as long as you're a Comptroller, the event page shows a Manage tab (alongside the Attendees tab) that regular members don't see.
Turning Ticketing On
- Open Events from the sidebar and click into the event.
- Open the Manage tab on the event page — Comptrollers and admins always see it; regular members don't.
- Flip the Sell tickets for this event toggle on.
- Set the rest of the ticketing fields (below).
- Click Save ticketing settings.
Once saved, the event page immediately starts showing a Tickets panel. Eligible members see Buy ticket and Buy for another member; as a Comptroller (or admin) you also see a Comp ticket button for issuing free seats — see Comping a Ticket below.
What Each Setting Does
- Sales open at
- The date and time tickets go on sale. Use this to pre-list an event without starting sales immediately.
- Sales close at
- When ticket sales stop. Usually a day or two before the event so you can get a final headcount.
- Attendee capacity (blank = unlimited)
- Total headcount including guests — the helper text reads "Counts total attendees including guests, not tickets." Leave blank for unlimited. fellos stops accepting purchases once you hit this number.
- Default self-seat price (USD)
- The base price per member seat in dollars. Enabling ticketing seeds a row for every member type at this price; you then edit each row below to charge different prices by member type.
- Post to the feed when attendees check in
- When on, the activity feed gets a small "so-and-so is at [event]" note every time someone is scanned in. Nice for community vibe; turn off if your event is sensitive.
Self Seats — One Per Member, Priced by Type
The Self seats section has a one-line reminder at the top: "Mandatory. Each buyer gets exactly one, chosen by their member type." In other words, every member can only buy one self seat for themselves — the question is only how much it costs for their member type.
Enabling ticketing seeds one row per member type at the default price. Each row looks like:
- Emeritus Gardener Seat — $25.00 · max 1 · Emeritus Gardener
- Gardener Seat — $25.00 · max 1 · Gardener
- Seedling Seat — $25.00 · max 1 · Seedling
Click Add to add a row for a member type that's missing, or edit existing rows to charge different prices per type (e.g., $15 for Emeritus, $25 for Gardeners, $20 for Seedlings). Remove a member type's row to prevent that type from buying a self seat at all.
Extras — Guest Tickets and Add-ons
The Extras section sits below Self seats with its own helper line: "Optional add-ons like Spouse, Guest, or Child." Use it for things buyers can tack onto their own seat:
- Guest — $35. Members can bring a plus-one.
- Child — $15. For family events.
- Meal upgrade — $10. Adds a food option to the ticket.
Each extra has a label, a price, a "max per member" number (so you can cap how many any one person brings), and a member-type filter that defaults to Any member type. Narrow the member-type filter when a particular extra should only be available to certain types (e.g., only full members can buy guest tickets).
What Members See
When a member opens the event page and ticket sales are open, they see a Tickets panel with two buttons:
- Buy ticket — opens a "Buy ticket" dialog with the copy "Your self-seat is mandatory. Add any optional extras below." Their mandatory self seat is already selected (priced for their member type), with a guest-count stepper, a Total attendees line, and a running Total. Buttons are Cancel and Buy.
- Buy for another member — opens a dialog with a Recipient member dropdown that lets them pick who the ticket is for; buttons are Cancel and Reserve ticket.
After purchase the member lands on a "You're in!" confirmation page with their QR code, an itemized receipt (member seat, member-type seat, and any guest seats) ending in Total paid, and a View ticket link they can open on event day. The View ticket page is headed "EVENT TICKET" and shows the QR with the caption "SHOW THIS CODE AT CHECK-IN — Your whole party enters together on this one code." The event page itself now shows the attendee list, including how many guests each buyer is bringing (e.g., a row reading "Root +1 guest").
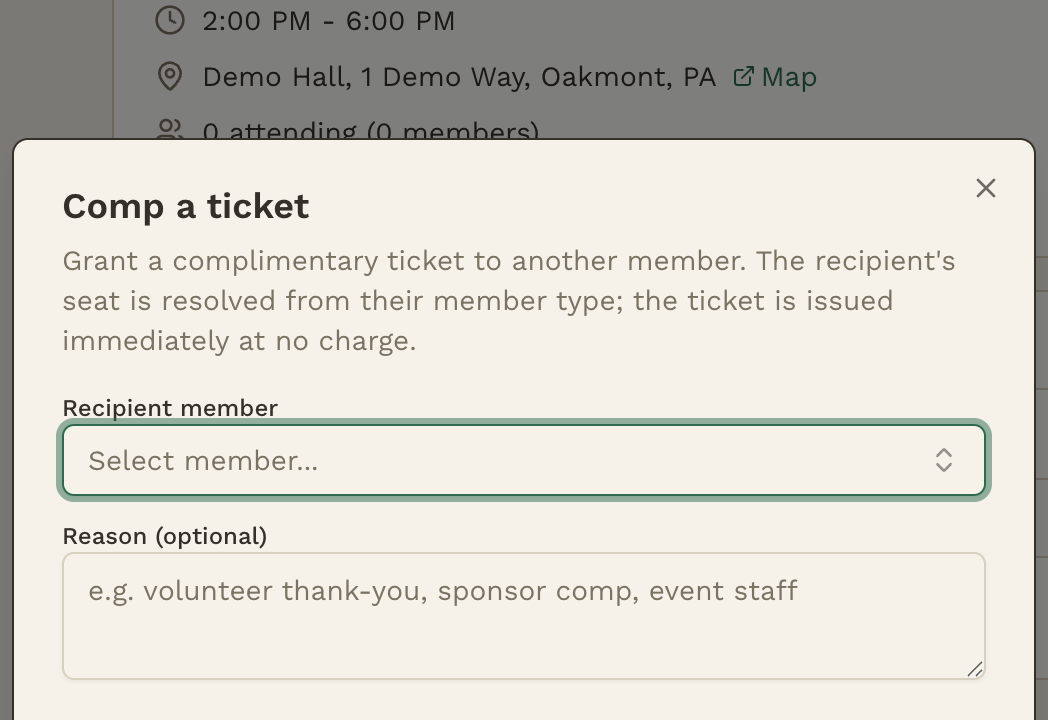
Comping a Ticket
Comptrollers and admins get one extra button in the Tickets panel that regular members never see: Comp ticket. Use it to issue a free seat — a volunteer thank-you, a sponsor comp, event staff — without running a charge through Stripe.
Clicking Comp ticket opens the Comp a ticket dialog: "Grant a complimentary ticket to another member. The recipient's seat is resolved from their member type; the ticket is issued immediately at no charge." Pick the Recipient member, optionally record a Reason (the field suggests "volunteer thank-you, sponsor comp, event staff"), then confirm with Comp ticket — or back out with Cancel. The seat is created at no charge, and the recipient appears in the attendee list just like a paying ticket-holder.
Seats Remaining & Attendee List
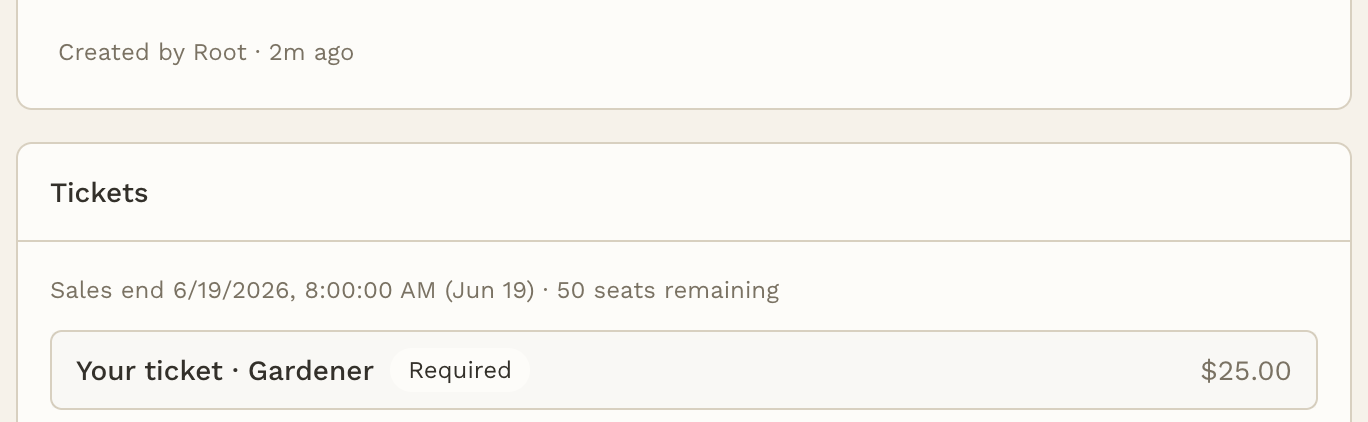
The Tickets panel on every paid event shows the sales-end time and seats remaining — something like "Sales end 5/10/2026, 8:00:00 AM · 42 seats remaining." Below the panel, the Attendees list updates in real time as people buy, showing who's coming and any guest counts.
There isn't a built-in CSV export in fellos today — if you need a spreadsheet of buyers for planning (dietary needs, name tags, table seating), your Site Admin can pull the sales list from Stripe alongside attendee names from fellos.
To refund a ticket, ask your Site Admin to process it through Stripe. Cross-check the attendee list against refunds before event day so you know not to let a refunded ticket in.